Tag: diy

Helpful Tips for Picking and Cutting Watermelon

Watermelon is a summertime staple. Each summer, stores, and farm stands have an abundance of watermelons on display, and many people feel no picnic or barbecue is complete without watermelon.

Watermelon is a refreshing option on hot days. It’s ideal sliced and served, or can be included in fruit salads, smoothies or even “spiked” cocktails. The key to a tasty watermelon is knowing how to pick one that is ripe while serving watermelon comes down to understanding some easy-cutting strategies.

Choose a watermelon that has a firm, symmetrical shape

Avoid melons with bumps, dents or cuts.

Watermelons should be relatively heavy

They’re 92 percent water, and that juiciness should be reflected in a substantial weight for the melon’s size.

Watermelon.org advises looking for a creamy yellow spot on the underside of the watermelon

This is called the “ground spot.” It indicates where the melon sat on the ground and ripened in the sun. Once cut from the vine, a watermelon has about three to four weeks to be consumed.

All parts of the watermelon are edible, including the seeds and rind

The rind can be pickled or cut up to use in stir-fry dishes.

When bringing watermelon to an event, it is a courtesy to bring it already sliced or cut up. This ensures the host or hostess does not have to tackle what can sometimes be a chore. Here are three techniques to cut a watermelon easily.

Cubes

1. Cut both ends off of the watermelon.

2. Stand the watermelon on one sliced end. Use the knife to slice down and cut off the rind.

3. After removing the rind from all sides of the melon, cut into discs about 1/2-inch in thickness.

4. Then cut those discs into cubes.

Slices

1. Cut the watermelon in half lengthwise.

2. Take one cut half and place it cut-side down.

3. Cut the watermelon into slices.

4. Repeat for the other cut half.

Strips

1. Cut the watermelon as you would with the slices. Rather than leaving it in large slices, turn the watermelon and cut the same size slices in the opposite direction. This creates strips that are easy for kids to grab and maneuver.

2. Repeat with the other half of the watermelon in the same manner.

Budget-Friendly Valentine’s Day Ideas

The National Retail Federation indicates Valentine’s Day is the fifth largest spending event in the United States after the winter holidays and Mother’s Day. Each February, people clamber to get gifts for their sweethearts and create romantic memories through fine dining and decadent desserts.

According to Finder, a tool used to navigate complex decision-making processes, Americans were expected to spend a combined $50 billion on gifts and activities in 2021, with gifts averaging $187. Men tend to spend more than women on Valentine’s Day.

Everyone may be spending more on Valentine’s Day this year due to inflation. In 2021, used cars and trucks, oil, meats and poultry, airline fares, and women’s apparel were just some of the items that increased significantly in price. Finding ways to be frugal may be challenging this February, but these ideas are a start.

DIY card

While a card may be the smallest purchase on your shopping list, you can still save an average of $3 to $5 on a card by making one yourself or sending a free digital greeting.

Dine in

Restaurants are popular options for couples on Valentine’s Day, but they can be busy and prices may be inflated. Many also offer limited prix fixe menus. By making a meal at home and picking and choosing less-costly ingredients, couples can save a substantial amount of money.

Be flexible with jewelry

You don’t have to spend a fortune to make an impression with gifts. Diamonds may be a girl’s best friend, but other stones are often less costly. Try giving a birthstone as an alternative. If gold is out of your price range, many sterling silver options are just as beautiful. In addition, consider warehouse retailers for jewelry purchases, as they may have lower costs.

Frugal flowers

The cost of roses definitely goes up near Valentine’s Day, so consider giving another flower. Lilies can be lovely or maybe that special someone has a signature flower. A flowering plant, which will cost less than many bouquets and will last far beyond Valentine’s Day if given care, is another alternative to consider.

Save on chocolate

Sweet treats are the name of the game, but many popular chocolate boxes can be pricey this time of year. Plan ahead and keep a stockpile of chocolates from Halloween or Christmas. Then use floral wire or pipe cleaners to turn bite-sized packages into a handmade chocolate bouquet. Otherwise, purchase various chocolate bars and package them with hot chocolate, chocolate cookies and other decadent offerings in a themed gift basket.

Saving on Valentine’s Day comes down to being creative and focusing on the sentiment rather than the price.

Should I DIY?: 3 Questions to Determine if It’s Best to Renovate On Your Own

A do-it-yourself mentality has taken hold in millions of households across the globe. Popular television channels like HGTV and DIY Network as well as accessible home improvement content on apps like YouTube has inspired many homeowners to tackle renovation projects around their homes. Taking such initiative is admirable, though it also can prove costly if homeowners end up biting off more than they can chew.

Home improvement videos and television shows have a tendency to oversimplify renovation projects, potentially giving homeowners a false sense of confidence in their DIY abilities. A concerted effort on the part of homeowners to determine if it’s best to renovate on their own or hire a professional should always be the first step of any renovation project. No two homeowners are the same, but the following three questions can help homeowners determine if DIY is their best option.

1. Can I afford to DIY?

Professional home improvement projects are costly for a variety of reasons. Materials can be costly, but so are the tools and labor necessary to do the job right. Homeowners may not have the tools necessary to complete complicated projects. Specialty tools can be expensive to purchase or even rent, and the cost of acquiring such tools should be included in any DIY project cost estimates. Labor also factors heavily into professional projects, and for good reason. Talented contractors have unique skills that have been developed and perfected over many years. Those skills can ensure projects are completed quickly and correctly. Labor may seem costly, but such costs may ultimately prove to be a bargain compared to the cost of fixing DIY mistakes. Projects that are minor in scope and don’t require the use of potentially costly specialty tools may be better suited for weekend warriors than more complicated renovations.

2. Do I have the time?

Homeowners must determine how much time they have to complete a project before deciding to do it themselves. No one wants to spend months staring at an unfinished renovation project. Homeowners who are already pressed for time may not be able to complete projects in a timely fashion, which can make homes less comfortable and even less safe.

3. Can I pull this off?

DIY projects can instill homeowners with a sense of pride in their homes, but it’s imperative that homeowners considering the DIY option conduct an honest assessment of their skills. A lack of renovation experience does not necessarily mean a homeowner cannot successfully complete a DIY project. But in such instances, it may be best to start with small, straightforward projects and then gradually move up to bigger, more complicated projects as skills are fine tuned. And homeowners who have never been at their best with a hammer in hand should not be ashamed to leave the work to the professionals.

Television shows and online tutorials can make renovations appear easier than they actually are. Homeowners considering DIY renovations can ask themselves a handful of questions to determine if they’re ready for the challenge of renovating their homes on their own.

Inspiration and Ideas for Summer Gardening and Home Improvement

With longer days and shorter nights come warm weather opportunities to make home and garden improvements. Become inspired to start working on projects, both indoors and out, with these new seasonal books.

Caring for Cacti

There’s much more to your little green plants than just keeping them alive, according to “Happy Cactus: Cacti, Succulents, and More.” Unearth the secrets of different cacti and succulents with profiles of more than 50 popular varieties — from the cute, flowering pincushion cactus to the wacky prickly pear. Discover what makes your plant unique and find out where to put it, when to water it, what to feed it, what to look out for, and how to encourage its distinctive traits, from flower stalks to fast growth.

Simplify Your Life

Living simply can mean living better, according to “Less: A Visual Guide to Minimalism.” Using, flow charts, icons and other graphics, the book demonstrates how to apply minimalism to your home, wardrobe, decor, cooking, cleaning and finances, to give you more time, space, money, clarity and overall enjoyment of your experiences.

Understanding Tools

Are you a DIYer or aspire to be one? Get a better handle on tools with “The Tool Book: A Tool Lover’s Guide to Over 200 Hand Tools.” This visual guide highlights how to use, understand and properly care for over 200 hand tools, and includes a foreword by Nick Offerman, host of NBC’s “Making It.” Discover why each tool is perfect for the job, through step-by-step illustrations and scientific explanations, and why it deserves a prominent spot in your shed, workshop, studio or makerspace.

Gardening Indoors

Learn where to place houseplants for the best effect in your home and how to properly care for them, with the trusted advice, creative inspiration, strong visual aesthetic and step-by-step detail found in “Practical Houseplant Book.” Two-hundred plant profiles provide information and care instructions for a variety of plants, including ferns, orchids and succulents, while a dozen photographic projects offer ideas for using plants to decorate your home or greenhouse — from eye-catching terrariums to a living succulent wall. With information on plant care, propagation, pests and diseases, pruning, and problem-solving, this is a useful guide for any indoor gardener.

Growing Food

Whether you’re a beginner or seasoned grower, “Grow Something Different to Eat: Weird and wonderful heirloom fruits and vegetables for your garden,” can give you confidence to grow, cook and preserve some unusually tasty crops. Learn to grow unique fruits, vegetables and grains, such as orange eggplants, quinoa, chia, and white strawberries. All plants can be started indoors and kept as houseplants, or grown outdoors in the garden.

This summer, discover creative ideas for improving your indoor and outdoor spaces with gardening, DIY projects, and more. (StatePoint)

The Secrets to Being an Organized Family

Modern families seem to be juggling more than ever before. When time seems to be a luxury, an ability to stay organized can help families manage the hustle and bustle of daily life more effectively. An online survey conducted by an internal research team on behalf of The Huffington Post polled more than 1,000 American adults in 2013, revealing 84 percent of recently stressed Americans say they worry that their home isn’t clean or organized enough.

Within that group, 55 percent cited disorganization at home as a source of recent stress. Disorganization does not occur overnight, and neither will getting re-organized. But with some motivation, all families can become more orderly.

Manage mornings

Families can usually use more help getting out of the house each morning in a timely manner. Each member of the household should have a designated area where they keep the items they will need for the next morning. Backpacks and briefcases should be prepacked, and lunches made the night before. In addition, sort the next day’s clothes before going to bed. Such efforts should make it easier to get out of the house on time each morning.

Sort the entryway

Home entryways are usually hubs of traffic. Such areas are the first and last place family members go when entering or leaving the house. As a result, these areas are in need of some routine organizational attention. Use sorting bins for shoes, hooks for coats, trays for mail or homework, and other sorting equipment to keep things tidy and orderly.

Embrace the purge

Take a hard look at what you use and what you don’t use around the house. Holding on to items you rarely use can contribute to clutter and create a disorganized home. Save only a few sentimental items, donating, recycling or discarding the others. Many organizational experts suggest going through items one by one and asking oneself if this is something that has been used recently. If it’s been collecting dust for a year or more, it can go.

Sensible storage

Analyze what you have and then find sensible storage solutions. Store belongings in the same place each day so items are easy to find when needed. Frequently used items should be easily accessible. Seldom used items, such as holiday decorations, can be stored out of the way.

It takes commitment and time to get organized. However, life tends to move along much more smoothly in organized homes than homes marked by clutter.

Create an Inviting Outdoor Living Environment

Be ready to enjoy the warm days of spring and summer with an “updated” outdoor dining/living/garden area that is welcoming and efficient. Woodcraft has the tools and supplies you will need, along with helpful advice at your local store and free how-to articles on Woodcraft.com.

Projects

Take stock of your outdoor furniture — do you need more? Would colorful new Adirondack chairs, a new picnic table and maybe a garden bench and planters be more inviting? Or perhaps a cleanup and new paint would bring your existing furniture to life for another season? Does your porch/patio/deck area need to be resurfaced or enlarged? Streamline your dining by building mobile carts to transport food for prep and for serving. Add a butcher block top to the food prep cart and storage drawers to both, and improve the efficiency and pleasure of your dining experience. Gardeners may want to build a potting bench and wooden flatbed wagon to haul plants and supplies.

Tools, Supplies and How-Tos

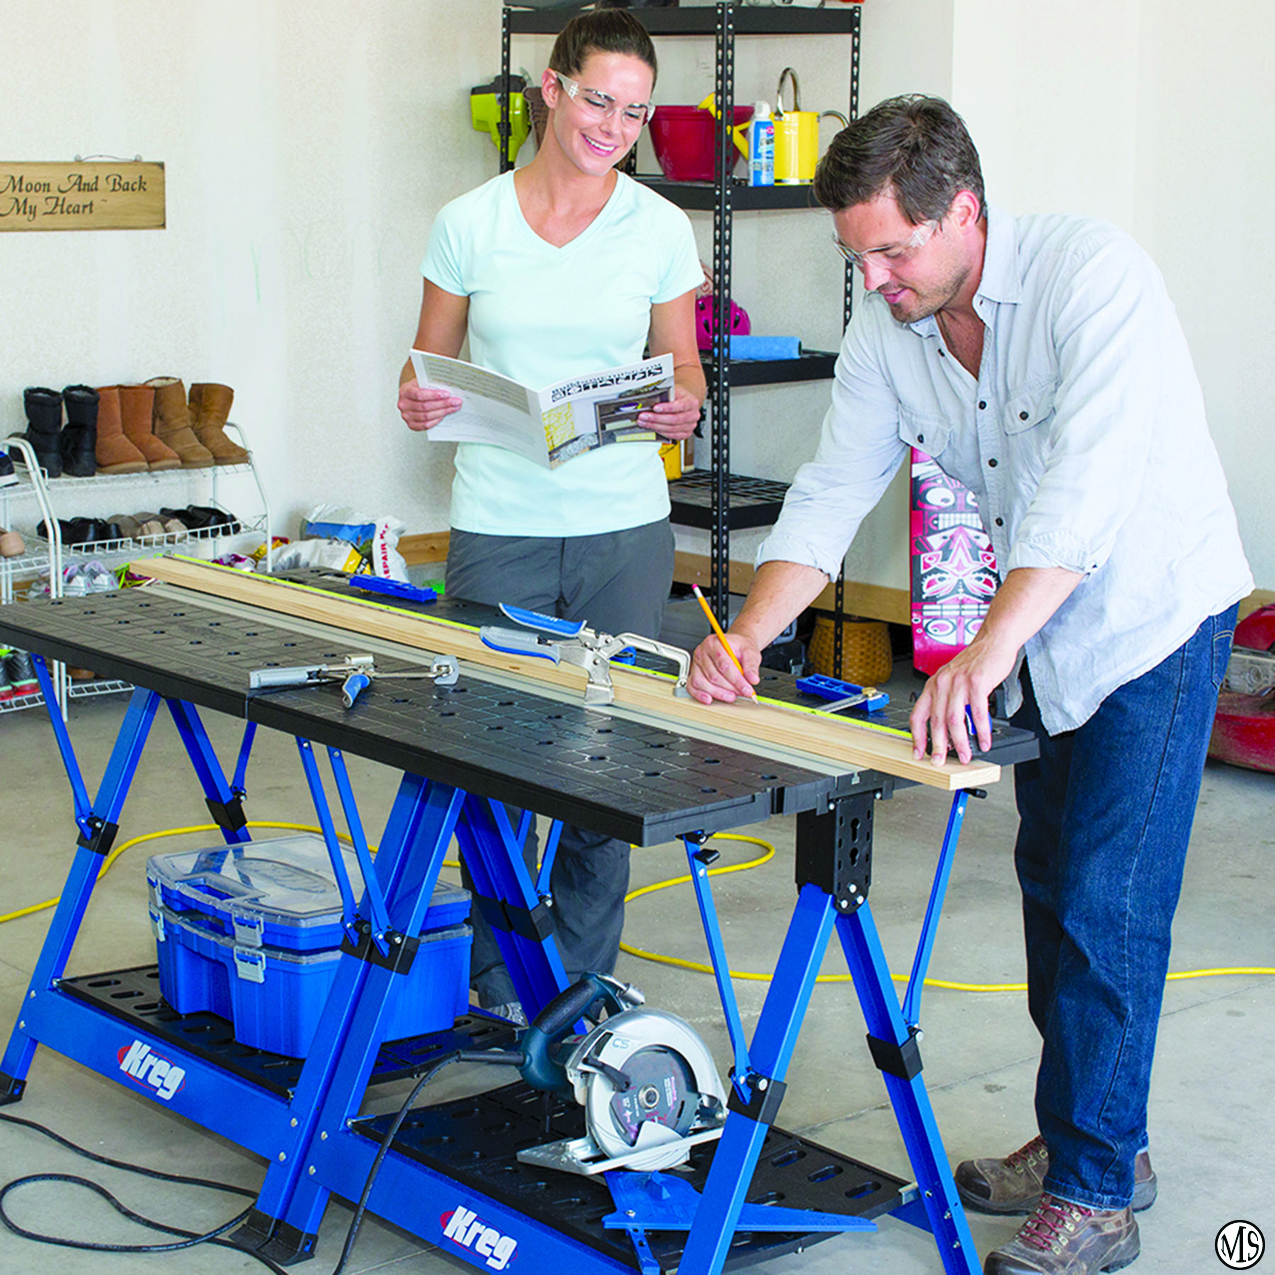
“Make anywhere your workspace with the Kreg Mobile Project Center,” Woodcraft senior product manager Peter Collins said. “It’s a portable workbench, sawhorse, assembly table, and clamping station all in one that provides a versatile work space for DIY, repair, and woodworking projects.” The large 273⁄4″ x 311⁄2″ polypropylene work surface supports a 350-lb. load capacity, and two centers can be connected to double the work area. Collins also suggested adding the new Kreg In-line Bench Clamp and Bench Clamp System for Dog Holes to make almost every clamping task possible. Visit Woodcraft.com to see Building Plans for Outdoor Furniture, as well as Adirondack chair templates.

Woodcraft.com also offers a large number of how-to articles such as “Laid Back in a Classic Adirondack” that shows how to build with Adirondack chair templates, while “WoodSense: Spotlight on Outdoor Projects,” describes woods that work well outdoors. For building projects, the Freeman 11⁄4″ 18-Gauge Brad Nailer is a professional quality, innovative home improvement tool that is great for furniture. Its oil-free operation requires no regular maintenance and eliminates the risk of stains on project surfaces.

If your joinery choice requires screws, the Groz Insta Drive Screwdriver features a patented retractable, rotating bit cartridge that makes it easy to find, store and change driver bits. For hauling lumber or other large items to your project site, use the Xstrap Heavy Duty Ratchet Tie Down to hold up to 1,000 pounds in place on a truck bed. To finish new furniture or recolor existing pieces — and brighten your outdoor landscape — choose one of the 28 premixed General Finishes Milk Paint colors that can be mixed, lightened, glazed, layered, antiqued, or distressed.

Other good choices for outdoor surfaces include General Finishes Outdoor Oil Finish (use over exterior oil stain or exterior clear oil finishes for additional protection) and General Finishes 450 Varnish (minimizes fading, retards mold and fungus growth).

For painting guidance, watch “Hand Applied Milk Paint from General Finishes at Woodcraft” and read “Create a Milk Paint Masterpiece” on Woodcraft.com. HOMERIGHT’s Finish Max HVLP Sprayer will spray most solvent (except lacquer and conversion varnish) or water-based products — latex paint, milk paint, chalk paint, furniture paint, stains, and finishes. It’s easy to set up, use and clean. When painting furniture, consider using the HOMERIGHT Large Spray Shelter. When painting small accessories, opt for the Small Spray Shelter.

For furniture that needs some TLC, read “Restoring Outdoor Projects” on Woodcraft.com to learn how to determine what needs to be deep cleaned, repaired, rebuilt and repainted. Handy helpers for the TLC process include Blue Bear Paint and Urethane Stripper, Krud Kutter No-Rinse Prepaint Cleaner, Titebond III Ultimate Wood Glue, SculpWood Putty, and Briwax ChaiRX.

Garden & Game Projects

Turn a unique transplanter, cultivator and weeder with the three-piece WoodRiver Garden Tool Turning Kit constructed of durable, cast aluminum. Turning blanks for the handle, sold separately, may be made from wood, acrylic or another man-made material. Build a wooden croquet set with help from “Picnic Perfect Croquet Set” in Issue 65 of Woodcraft Magazine. Subscribers can download the article free, or the issue can be purchased at Woodcraft.com.

To learn more about these and other products, visit your local Woodcraft store, call (800) 535-4482 or visit www.Woodcraft.com.

Early-Blooming Spring Flowers

The arrival of spring is a welcome occurrence for many people. Budding flowers are among the harbingers of spring. Spring flowers can revitalize winter-weary people just when they need it most — and provide reassurance that brighter, warmer and longer hours of sunlight are just around the corner. Cold-tolerant flowers are hardy enough to start blooming before the last frosts have dissipated. Other flowers will begin to fill in as days warm a little bit more, according to Better Homes and Gardens. Home gardeners looking to warm up their gardens with early blooms can use these flowers in their early-season containers, window boxes and planting beds.

Pansy

Pansies prefer cool weather, which can make them one of the best flowers to plant in early spring and late fall. Pansies come in a variety of colors, so there’s bound to be an offering that will blend with any homeowners’ landscape design.

Creeping phlox

Also known “moss phlox,” creeping phlox is a short ground-cover that is a herbaceous perennial. Phlox produces small, fragrant flowers in dense clusters, which can attract wildlife, such as butterflies, to their mats across the soil surface.

Snowdrops

Snowdrops can peek out even when there is snow still on the ground — sometimes as early as January and February. But their name is actually a reference to their appearance, as snowdrops have three white petals that hang down like drops dripping off the stem.

Violets

These flowers are closely related to pansies and, as a result, prefer cool seasons. Violets are generally slightly smaller than pansy blooms, but they can be just as beautiful. But as with pansies, violets will start to fade when the heat arrives.

Crocus

Crocus plants are relatively small, only reaching three to six inches in height. However, their grass-like leaves are some of the first sprouts that can be seen among bulb and corm plantings. Preferring full to partial sun, these gold, purple, lavender, white, or yellow flowers can be enjoyed during the earliest days of spring.

Daffodil

Daffodil bulbs produce cheerful, yellow flowers in early spring. They’re one of the most recognizable flowers thanks to their familiar shape and fragrant aroma.

Lenten rose

Hellebores, also called the Lenten rose or Christmas rose, can tolerate light frosts. These blooms get their name from the time of year when they bloom, which is typically around the Christian Lenten season. Despite their name, these delicate flowers are not actually related to roses, however.

Early-blooming flowers give winter-weary gardeners hope that spring has arrived.

8 Tips for Maximizing Garage Storage

Most people are pressed for garage space, regardless of the size of their house, from DIYers overwhelmed with tools to moms searching for places to store holiday decorations.

Toter, a leading manufacturer of carts, cans and containers for use in a wide range of home and work waste management and storage solutions, is offering the following tips for making more of precious garage space.

Keep trash in its place.

To keep trash and odors contained, select a mobile trash cart with a tight-fitting lid that’s compatible with your haulers’ pickup requirements and comes with a warranty. Some manufacturers also offer cart and can liners and deodorizers to keep your garage smelling fresh.

Invest in a multi-purpose job box.

Most people tend to have the wrong size toolbox for their needs. Consider the shape, capacity and compartments needed for your tools. Rolling options are great for work done only at home, while a job box may be better for those who do work elsewhere. If portability is important, look at lighter-weight options. New plastic job boxes, such as the Toter HardHead, combine the strength, durability and security of a large metal box with enhanced maneuverability.

Build up, not out.

Ceiling storage racks are an excellent way to use what would otherwise be dead space. Many racks are designed to fit directly above the area where an automatic door goes up and down. Peg boards for tools and stackable totes are also good choices.

Choose multipurpose storage.

Needs can change over time, so invest in storage that can be used for a variety of items in multiple ways. For example, large, durable totes can hold lawn gear, tools or camping equipment.

Think mobility.

Being able to move containers within the garage is important. However, the ability to move them into your vehicle and hit the road quickly also makes life a lot easier.

According to Jeniffer Coates, director of product development and warranty for Toter, “Heavy metal containers are difficult to move, and cheap plastic bins are often too flimsy to stand up to long-term or outdoor use. Consumers will get the most mileage from durable, impact-resistant plastic containers.” These can cost a bit more upfront, but will stand the test of time.

Protect items.

Moisture and pests cause problems in even the cleanest garage. Look for durable storage containers with tight-fitting, critter-resistant lids.

Categorize.

Assign and color-code dedicated areas for each type of item — tools, decorations, lawn equipment, etc. — to avoid the hassle of searching.

Allow room to grow.

While it can be tempting to stuff every square inch, try to leave room for future additions. To ensure everything deserves the space it’s occupying, do a yearly purge of unneeded or unused items.

For more information on finding the right storage solutions for your needs, visit toter.com/storage-solutions.

Keeping the garage in order is a necessary evil, but with a solid game plan and the right equipment, it’s easier than you think. (StatePoint)

Preserve Carved Pumpkins in Various Ways

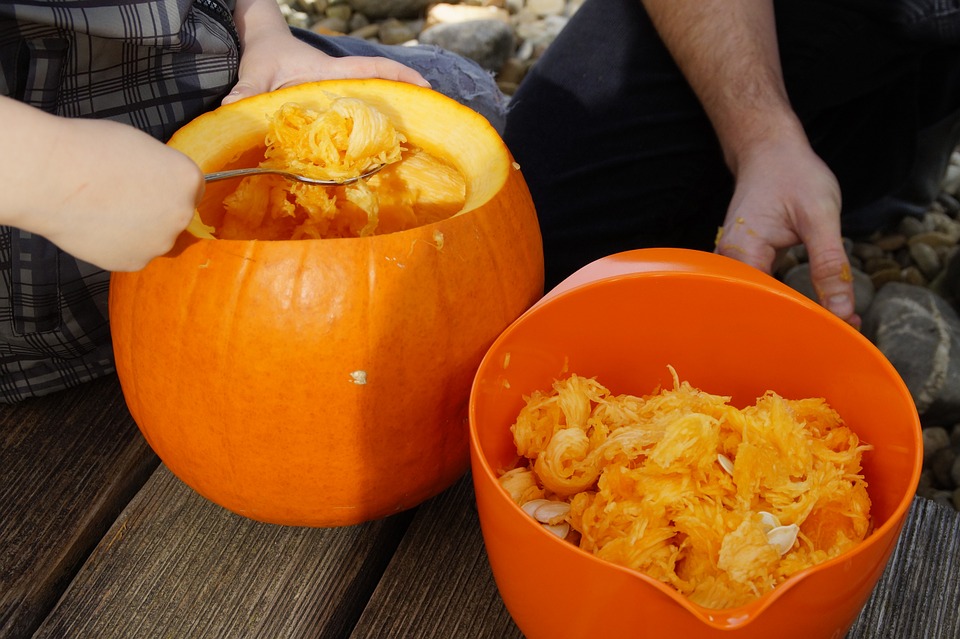
Jack-o’-lanterns and other carved pumpkin designs are frequently the centerpieces of Halloween festivities. The twinkling lights and orange glow of jack-o’-lanterns can add ambiance to any autumn event. The trouble with carving pumpkins is that most people want to do it right away, only to discover their pumpkins wilt and decay long before Halloween.

Nothing ruins Halloween more than visiting a home to trick-or-treat and not getting candy. Equally disappointing is a sad pumpkin display withering away on a front porch. Even though all pumpkins will eventually rot, certain tips can keep carvings from collapsing too soon.

· Choose a sturdy pumpkin. Inspect the pumpkin of your choosing carefully, looking for gouges, spots and holes. Even a small blemish can quickly expand into a mushy mess. Select pumpkins with even color and firm flesh, and make sure that the pumpkin doesn’t feel tender when you push on the skin.

· Visit local pumpkin stands. Pumpkins that have been shipped miles and miles in hot cargo trucks may be overly ripened or battered. Pumpkins that were grown nearby may be fresher. Plus, buying pumpkins locally supports local farmers.

· Scrape the insides of the pumpkin thoroughly. Any moist bits inside the pumpkin will mold quickly. The pumpkin carving experts at Pumpkin Masters recommend scraping as much of the “guts” out as possible, leaving about a one-inch thickness of the wall of the pumpkin.

· Coat the pumpkin. Preservation methods may aim to keep the pumpkin hydrated and inhibit mold and other microbial growth. Commercially sold pumpkin preservation products, such as Pumpkin Fresh®, hold up well. Soaking and spraying carved pumpkins with a bleach-and-water solution also seems to preserve designs.

· Keep it out of the elements. Store carved pumpkins in a cool, dry place. This will help slow down the rotting process for pumpkins exposed to outdoor fungi, other microbes and warm sunlight.

· Use an artificial light source. Reduce the heat inside of the pumpkin and encourage hydration by selecting a battery-powered light instead of a lit candle to illuminate the carving.

· Skip the carving. Once pumpkin skin is compromised, microbes can enter. In lieu of carving, paint or decorate pumpkins in other ways if you want them to stay fresh for a long time. Glow in the dark paint can help pumpkins stand out at night.

Carved pumpkins may last a week or two, while uncut pumpkins can last for a month or more. Keeping pumpkins hydrated and mold-free will prolong your designs.

Satisfy With A Simple, Spicy Appetizer

Hosting often involves serving food, and the following recipe for “Spicy Cheese Balls” from A.J. Rathbun’s “Party Snacks!” (Harvard Common Press) is sure to please hosts who want to serve their guests an hors d’oeuvre that’s simple but spicy.

Spicy Cheese Balls (Makes 35 to 40 bite-size balls)

1 8-ounce package cream cheese, at room temperature
1 cup grated sharp cheddar cheese
1 teaspoon minced garlic
1 tablespoon chopped fresh parsley
1 teaspoon cayenne pepper
1 teaspoon freshly ground black pepper
1/2 teaspoon kosher salt
1 cup finely chopped walnuts

1. Put the cream cheese, cheddar, garlic, parsley, cayenne, black pepper, and salt in a food processor. Process for 5 to 10 seconds, until well blended. Scrape the mixture into a bowl, cover, and refrigerate for 1 hour.

2. Spread the chopped walnuts on a plate. Shape the cheese mixture into 35 to 40 small cheese balls, each about the size of a large marble. Roll each cheese ball in the walnuts, coating the outside (you may to press a little to ensure sticking).

3. Serve the cheese balls on a large platter. You can put a toothpick in each ball, but you could also surround them with crackers and let guests use their hands. It all depends on what kind of party you’re having.