Tag: recipes

A Summer Dessert That Is Just Peachy

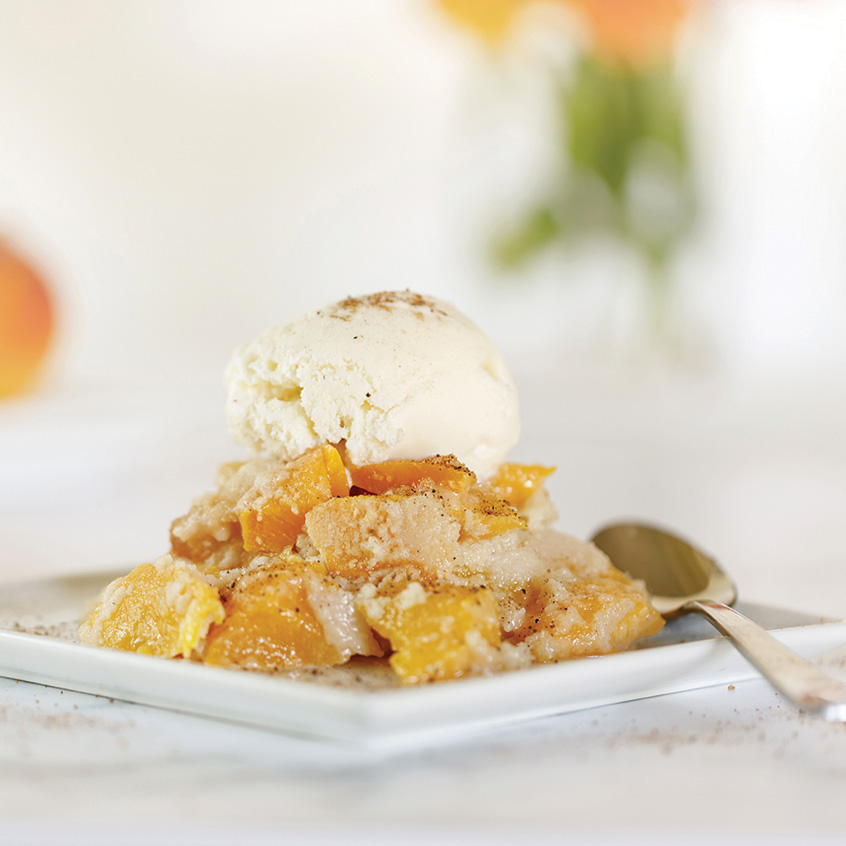
Peaches are a nutritious summertime favorite. Peaches are antioxidant-rich, include a wide range of vitamins and minerals, and are rich in fiber. And there is no denying how sweet and tasty peaches can be, whether they’re plucked right from a tree or enjoyed in any number of recipes.

Cobbler is a type of dessert that gained popularity in the United States during the 19th century. It is made by putting fruit in a deep baking dish and then topping it with a drop of biscuit batter and sometimes a crumb topping. Any number of fruits work well in cobblers, including apples, pears, and various berries. However, peach cobbler is the quintessential summertime treat.

Cobbler gets its name from the fact that early American settlers didn’t have strict recipes with exact measurements for ingredients, so they took what they had and “cobbled” them together.

Today’s cobbler bakers enjoy the benefits of having more direction when putting together their desserts. This recipe for “Southern Peach Cobbler” comes courtesy of Paula Deen.

Southern Peach Cobbler

Serves 15

11/2 cups self-rising flour

1 stick butter

1/2 cup water

2 cups sugar, divided

4 cups peaches, peeled and sliced

1 cup milk

Ground cinnamon (optional)

Preheat the oven to 350 F.

Combine the peaches, 1 cup sugar, and water in a saucepan and mix well. Bring to a boil and simmer for 10 minutes. Remove from the heat.

Put the butter in a 3-quart baking dish and place it in the oven to melt.

Mix remaining 1 cup sugar, flour, and milk slowly to prevent clumping. Pour mixture over melted butter. Do not stir.

Spoon fruit on top, gently pouring in syrup. Sprinkle top with ground cinnamon, if using. Batter will rise to the top during baking. Bake for 30 to 45 minutes.

To serve, scoop onto a plate and serve with your choice of whipped cream or vanilla ice cream.

Serve Up Homemade Salsa This Cinco de Mayo

Much like St. Patrick’s Day is celebrated by people with no trace of Irish heritage, Cinco de Mayo has become a day of celebration for people who do not trace their ancestry to Mexico. In fact, History.com notes that Cinco de Mayo is a relatively minor holiday in Mexico, where the day commemorates a symbolic yet not significantly strategic win by a heavily outnumbered Mexican army over French forces sent by Napoleon III to establish an empire on Mexican land. In the United States, Cinco de Mayo has become a day to commemorate Mexican culture, including its much-loved cuisine.

Food is front and center at many Cinco de Mayo celebrations. Home cooks hosting friends or those who simply want to enjoy some homemade Mexican fare this Cinco de Mayo can try their hands at this recipe for “Fiery Corn Salsa” from Kelley Cleary Coffeen’s “200 Easy Mexican Recipes” (Robert Rose).

Fiery Corn Salsa

Makes 2 cups

1/4 cup olive oil

3 tablespoons freshly squeezed

lime juice

2 teaspoons minced fresh

cilantro

3 tomatoes, seeded and diced

11/2 cups corn kernels

2 to 3 jalapeño peppers, seeded

and diced

Salt and freshly ground black

pepper

1. In a large bowl, combine oil, lime juice and cilantro. Add tomatoes, corn and jalapeño to taste. Mix well until corn mixture is well coated. Season with salt and pepper to taste. Transfer to an airtight container and refrigerate, stirring occasionally, for 1 hour or up to 2 days.

Tip: In place of the corn kernels, you can used canned corn, drained; frozen corn, thawed; or corn from the cob, cooked on the stove top. For a smoky flavor, use corn grilled on the barbecue grill.

A Quick and Delicious Holiday Dessert

The holiday season is synonymous with many things, including delicious foods. While Thanksgiving turkeys or Christmas geese will be found on many a table this holiday season, baked goods and desserts are what many people look forward to this time of year.

Holiday hosts with a lot on their plates might not have the time to prepare homemade baked goods for their guests. Thankfully, the following recipe for “Chocolate-Strawberry Pie” from Addie Gundry’s “No-Bake Desserts” (St. Martin’s Press) can be prepared in just 15 minutes, all without turning on the oven.

Chocolate-Strawberry Pie

Yields 1 pie

1 pint fresh strawberries, washed, trimmed and halved
1 store-bought (or homemade) chocolate cookie pie crust
2/3 cup sugar
1/4 cup cornstarch
2 tablespoons unsweetened cocoa powder
1/4 teaspoon minced crystallized ginger
1/8 teaspoon ground nutmeg
Pinch of kosher or sea salt
6 large egg yolks
21/2 cups half-and-half
6 ounces bittersweet or semisweet chocolate, chopped
1/2 tablespoon rum extract
1 teaspoon vanilla extract
Additional strawberries for garnish (optional)

1. Place the strawberry halves in a single layer in the bottom of the pie crust.
2. In a medium saucepan, whisk together the sugar, cornstarch, cocoa powder, ginger, nutmeg, and salt over medium heat.
3. Whisk in the egg yolks to create a thick paste. Gradually whisk in the half-and-half until the mixture thickens, about 5 minutes. Bring to a boil and cook for 1 minute. Remove from the heat.
4. Add the chocolate and whisk until combined. Add the rum and vanilla extracts. Cool the mixture for 4 minutes.
5. Pour the filling over the strawberries and up to the top of the crust. Chill the pie for 2 hours or until set.
6. Garnish with additional strawberries, if desired.

Warm Up With a Classic Hot Toddy This Holiday Season

Come the holiday season, hot toddies are ideal for entertaining, providing spirited fun and a means to chasing away the winter chill.

Hot toddies have been around for centuries. Usually a mix of a spirit – either whiskey, rum or brandy – hot water, honey and spices, some believe the word “toddy” comes from an Indian drink of the same name that is produced by fermenting the sap of palm trees. Other sources say the hot toddy was created by Dr. Robert Bentley Todd, an Irish physician who prescribed a drink made of brandy, white cinnamon, sugar syrup, and water. The drink was dubbed the “hot toddy.”

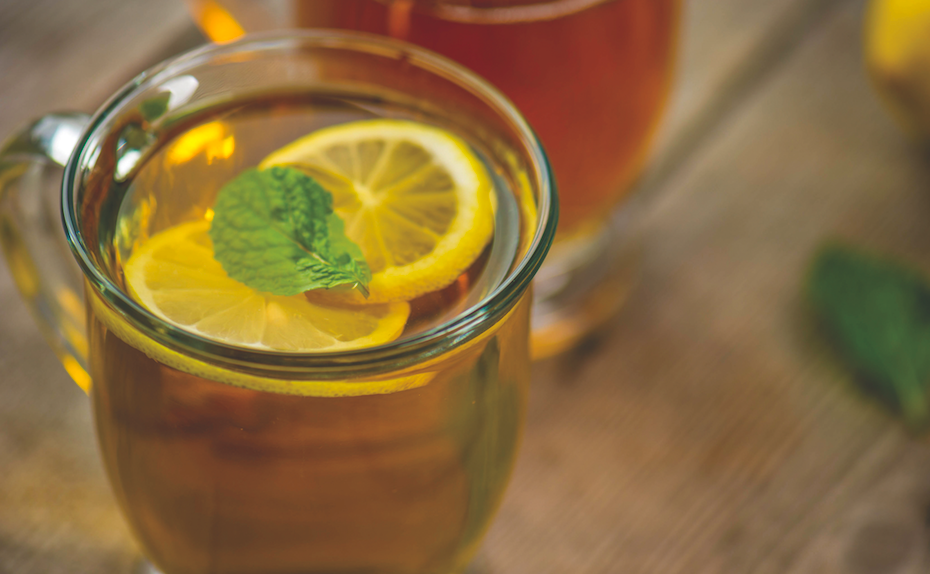
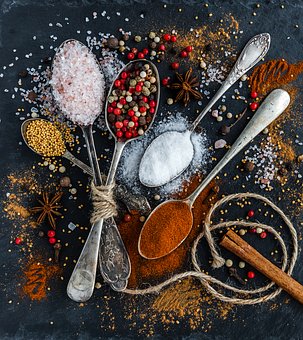
Hot drinks embellished with alcohol were long used for medicinal purposes. While alcoholic beverages are no longer used as medicine, hot toddies can still chase away a chill. “Grog” is another name given to hot alcoholic drinks, or any drink in which unmeasured amounts of spirits are mixed with other ingredients. Grog may also refer to a water-and-rum mixture that sea merchants once drank. The water kept the merchants hydrated, while the rum prevented the water from spoiling during voyages.

The classic hot toddy can be a versatile drink used to keep guests comfortable and cheerful. This warm libation is soothing and savory, mixing citrus, honey and spices, which each have their various health benefits.

Although hot toddy recipes vary, the following is the recipe for a classic hot toddy, as culled by recipes from Wine Enthusiast, Imbibe and PBS Food.

Classic Hot Toddy

• 11/2 ounces bourbon, whiskey or another brown liquor
• 1 tablespoon honey
• 1/2 ounce fresh lemon juice
• 1 cup boiling water
• Cinnamon stick
• Lemon wedge
• Cloves or star anise

Combine liquor, lemon juice, honey, and boiling water together in a mug or Irish coffee glass. Push cloves or star anise into the lemon wedge. Add the cinnamon stick and lemon wedge to the mug. Allow lemon and cinnamon stick to steep in the beverage for a few minutes. Stir and enjoy.

Baking Shortcuts for Time-Pressed Entertainers

‘Tis the season for baking cookies, cakes and other treats. However, during the holiday rush, it’s easy to get side-tracked or tired, and perhaps even a little bit overwhelmed by all the things to do in such a short period of time. Holiday baking doesn’t have to add to seasonal stress. With these tips and shortcuts, there will be plenty of sweet treats for the family.

Stick with tested recipes

Although holiday bakers may want to branch out a bit with their culinary creativity, recipes that have previously been prepared with great success can take some of the work out of holiday baking. Preparing recipes you recall preparing in the past is much easier than trying something new. If you’d like, add sparkle to old standards, such as decorating oatmeal or chocolate chip cookies with colored sprinkles.

Cookies are fast-baking

Did you know that cookies were originally made to test oven temperatures? Culinary historians say that cookies were first made to test if an oven was hot enough to bake other goods. Today, cookies can be whipped up in mere minutes. Make a batch of dough and then freeze or refrigerate it, thawing it when the time comes to bake. Also, think about baking one day and decorating the next if pressed for time.

Embrace colored candy melts

Icing can be tricky to master. Simply heating colored candy melts and pouring over cakes or painting onto cookies can add festive appeal to desserts. Candy melts even come in many different colors and can be combined to achieve the tint desired.

Keep ingredients in top form

Don’t let poorly performing ingredients or a lack of supplies be your undoing. Butter can be softened quickly in the microwave when needed for recipes. Eggs can be brought to room temperature by allowing them to sit in a bowl of warm water. Ensure that brown sugar stays soft by putting a piece of sliced bread in the container. Don’t forget to stock up on other baking staples, such as vanilla and almond extracts, baking powder/soda, molasses, and confectioner’s sugar.

Don’t bake from scratch

Not all recipes need to be made from scratch. Boxed cake mixes can be embellished and turned into delicious desserts without much fuss. Substitute melted butter for oil, buttermilk for water, and add an extra egg for a rich cake. Mix in chocolate chips or nuts or experiment with garnishes for a festive look.

Parchment paper is key

Line cookie sheets or cake pans with parchment paper for easy dessert release and quick cleanup. Parchment paper and even foil can help lift cakes or cookie bars out of pans so they look neat and do not stick.

Holiday baking can be made much easier by employing a few tricks of the trade.

My Franklin Shopper App

Satisfy With A Simple, Spicy Appetizer

Hosting often involves serving food, and the following recipe for “Spicy Cheese Balls” from A.J. Rathbun’s “Party Snacks!” (Harvard Common Press) is sure to please hosts who want to serve their guests an hors d’oeuvre that’s simple but spicy.

Spicy Cheese Balls (Makes 35 to 40 bite-size balls)

1 8-ounce package cream cheese, at room temperature
1 cup grated sharp cheddar cheese
1 teaspoon minced garlic
1 tablespoon chopped fresh parsley
1 teaspoon cayenne pepper
1 teaspoon freshly ground black pepper
1/2 teaspoon kosher salt
1 cup finely chopped walnuts

1. Put the cream cheese, cheddar, garlic, parsley, cayenne, black pepper, and salt in a food processor. Process for 5 to 10 seconds, until well blended. Scrape the mixture into a bowl, cover, and refrigerate for 1 hour.

2. Spread the chopped walnuts on a plate. Shape the cheese mixture into 35 to 40 small cheese balls, each about the size of a large marble. Roll each cheese ball in the walnuts, coating the outside (you may to press a little to ensure sticking).

3. Serve the cheese balls on a large platter. You can put a toothpick in each ball, but you could also surround them with crackers and let guests use their hands. It all depends on what kind of party you’re having.

Homemade Hummus With Truly Unique Taste

Hummus provides a delicious and healthy alternative to less nutritional dips. Versatile and available in various flavors, hummus can be whipped up at home for those who prefer to make their own dips. The following recipe for “Garbanzo-Carrot Hummus with Grilled Yogurt Flatbread” from James Campbell Caruso’s “España: Explore the Flavors of Spain” (Gibbs Smith) includes some Moroccan flavors that give this easy-to-prepare recipe a truly unique taste.

Garbanzo-Carrot Hummus with Grilled Yogurt Flatbread (Makes 2 cups)

2 medium carrots, peeled and chopped
Salt
1 cup cooked garbanzo beans, drained
4 teaspoons chopped cilantro plus 1 teaspoon for garnish
2 tablespoons chopped red onion
21/2 teaspoons ground cumin
11/2 teaspoons ground coriander seeds
2 tablespoons lemon juice
4 teaspoons olive oil
2 teaspoons chile flakes
2 teaspoons Moroccan Spice Blend (see below)
Coarse salt and freshly ground black pepper
1 batch Yogurt Flatbread (see below)

In a medium saucepan, combine the carrots with 2 quarts water and 2 teaspoons salt. Bring the mixture to a boil then reduce the heat and simmer for 8 to 10 minutes, until the carrots are tender. Remove the pan from the heat and allow the carrots to drain and cool in a colander.

Combine carrots and remaining ingredients, except for Yogurt Flatbread, in the work bowl of a food processor and puree until smooth. Season to taste with salt and pepper and garnish with the remaining cilantro. Serve with fresh, hot Yogurt Flatbread cut in wedges.

Moroccan Spice Blend (Makes about 2 tablespoons)

1 teaspoon ground cumin
1 teaspoon ground turmeric
1 teaspoon saffron threads
1 teaspoon ground coriander
1 teaspoon ground cinnamon
1 teaspoon ground smoked paprika
1 teaspoon finely grated lemon peel

In a small resealable glass or plastic container, combine all of the ingredients.

Yogurt Flatbread (Serves 4)

1 cup all-purpose flour
1/4 teaspoon baking powder
1 teaspoon coarse salt
21/2 cups plain yogurt
Olive oil

Sift the flour, baking powder and salt into the work bowl of a stand mixer fitted with the dough hook. Add the yogurt and mix on low speed for 2 minutes. Cover the work bowl and allow the dough to rest at room temperature for 30 minutes.

Preheat a gas or charcoal grill to medium. Scrape the dough from the work bowl and turn it out onto a lightly floured surface. Roll the dough into a long log and divide it into 12 equal pieces. Roll each piece into a ball and use a rolling pin or tortilla press to flatten it into a 1/4-inch-thick tortilla shape. Brush each “tortilla” lightly with olive oil. Grill each for about 40 seconds then turn and cook another 40 seconds.

Homemade Pie Crust Made Easy + Turkey Vegetable Pot Pie Recipe

Pot pie makes for a delicious meal, especially when home cooks go the extra mile and prepare homemade pie crust. Some may be intimidated by the idea of making their own pie crusts, but the following recipe for “Turkey Vegetable Pot Pie with Whole-Wheat Crust” from Michelle Dudash’s “Clean Eating for Busy Families” (Fair Winds) simplifies that process, ensuring a fun and easy time cooking and, ultimately, a delicious meal.

Turkey Vegetable Pot Pie with Whole-Wheat Crust (Serves 6)

For the crust:

1 cup whole-wheat flour
1 cup all-purpose flour
1/4 teaspoon salt
2/3 cup corn oil
1/3 cup orange juice

For the filling:

1 carton condensed cream of chicken soup (organic preferred)
1/2 cup low-fat milk
11/4 pound boneless, skinless turkey breast, thinly sliced into bite-size pieces
1 cup thinly sliced carrots (or frozen sliced carrots, thawed)
1 cup leeks, quartered lengthwise, then thinly sliced crosswise, using white and pale green parts only
3/4 cup thinly sliced celery
1/2 cup frozen peas, thawed
3 tablespoons whole-wheat flour
2 teaspoons dried herbes de
Provence (or 1/2 teaspoon each thyme, rosemary and basil)
1/2 teaspoon freshly ground black pepper
1/4 teaspoon salt

To make the crust: Combine flours and salt in a medium bowl. Pour in oil and orange juice and stir until moistened. Press dough to flatten and chill.
To make the filling: Blend soup and 1/2 cup of milk in a large bowl. Mix in the remaining ingredients.

Preheat the oven to 350 F. Divide dough into 2 balls, one slightly larger than the other. Roll the larger ball between 2 large sheets of waxed paper until it is 1/8-inch-thick or until it fits in the bottom of a 9-inch pie pan. Remove the top sheet of waxed paper. Turn dough over and carefully place in the pie pan, removing remaining piece of waxed paper. Press out any bubbles and patch holes with scraps of dough. Pour filling into the prepared pan. Roll remaining dough and lay it on top. Cut any excess dough hanging from the edges and crimp the crust between your thumb and forefinger to seal. Cut a heart into the center to allow steam to escape.

Place the pie on a sheet pan and bake for 1 hour and 15 minutes, until center of crust becomes golden and an instant-read thermometer inserted into the pie’s center reaches 165 F, covering browned edges only with foil about halfway through cooking. Remove the pie from the oven and allow it to rest for at least 5 minutes before cutting.

Give Boring Lunches a Big Boost

Lunch might not be the most exciting meal of the day, and conventional wisdom might not suggest it’s the most important meal. But that does not mean lunch has to be boring.

For those who tend to lean on sandwiches for their midday meals, straying from the sandwich norm can provide some variety and flavor. The following recipe for “Warm Tandoori Chicken Wraps” from Vicki Liley’s “Asian Wraps & Rolls” (Periplus) can make for a unique lunch for the whole family or even serve as an easily prepared dinner.

Warm Tandoori Chicken Wraps (Makes 6 wraps)

1/3 cup plain tandoori paste
2 tablespoons plus 1/2 cup plain yogurt
Grated zest and juice of 1 lemon
12 chicken tenderloin fillets or 3 skinless, boneless chicken breast fillets
2 carrots, peeled
1 English (hothouse) cucumber, halved and seeded
6 pieces naan
1 clove garlic, finely chopped

Leaves from 6 fresh mint sprigs, plus 2 tablespoons finely chopped fresh mint

In a small bowl, combine tandoori paste, 2 tablespoons yogurt, lemon zest, and lemon juice. Put chicken in a baking dish. Pour tandoori mixture over and stir until chicken is coated. Cover and refrigerate for 2 hours.

Light a fire in a charcoal grill or heat a grill pan. Brush grill or pan lightly with oil. Cook chicken for 4 to 5 minutes on each side, or until juices run clear when pierced with a skewer. Transfer to a cutting board and let rest for 5 minutes. Cut each tenderloin into 2 long strips (if using chicken breast fillets, slice each fillet into 4 long strips).

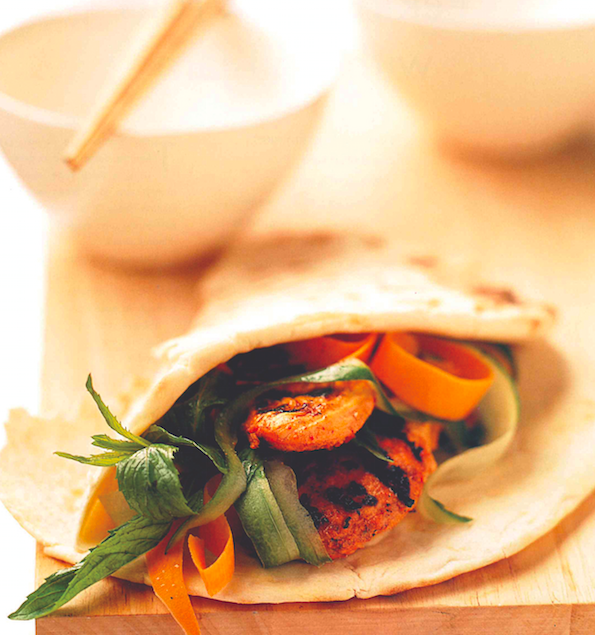
Using a vegetable peeler, cut carrot and cucumber into thin ribbons. To heat naan, follow instructions on packet. In a small bowl, stir 1/2 cup yogurt, garlic and chopped mint together.

Place naan on a work surface. Divide chicken, cucumber, carrot, and mint leaves among naan. Drizzle with yogurt mixture. Wrap the naan around filling and serve immediately.

Green Tomatoes Not Just for the Frying Pan

Perhaps in part due to the popular 1991 film “Fried Green Tomatoes,” many people are familiar with the Southern United States side dish of the same name. But as proven by the following recipe for “Grilled Green Tomato ‘Sandwiches’ with Herbed Cream Cheese” from Karen Adler and Judith Fertig’s “The Gardener & The Grill” (Running Press), green tomatoes can be even more delicious when grilled than they are when fried.

Grilled Green Tomato “Sandwiches” with Herbed Cream Cheese (Serves 6)

Herbed Cream Cheese

1 8-ounce package cream cheese at room temperature
1 garlic clove, minced
2 tablespoons chopped fresh basil
1 tablespoon snipped fresh chives

Tomatoes

4 large green tomatoes (about 11/2 pounds), sliced 3/4-inch thick (to make 12 slices)

Olive oil, for brushing

2 teaspoons Seasoning Salt (see below) or kosher salt

Ground black pepper

Prepare a medium-hot fire in your grill. Place a well-oiled perforated grill rack over direct heat.

In a bowl, blend the cream cheese, garlic, basil, and chives together until smooth. Set aside.

Brush the tomato slices with olive oil on both sides and season with seasoning salt and pepper. Place the slices on a baking sheet and bring out to the grill with the bowl of Herbed Cream Cheese and a knife for spreading.

Grill all of the tomatoes on one side for about 3 minutes with the lid open, then flip and grill on the other side for 3 minutes more, or until the tomatoes have good grill marks.

Remove the tomato slices from the grill and allow to cool slightly on the baking sheet. Spread Herbed Cream Cheese on half of the slices, top with a second slice and set the sandwiches on a platter. Serve the sandwiches hot, with oozing cream cheese filling.

Variation: Grill all of the tomato slices as above and top each grilled tomato with a dollop of the cream cheese and serve open-faced.

Seasoning Salt (Makes 11/4 cups)

1 cup sea salt
2 tablespoons paprika
1 teaspoon parsley flakes
1 teaspoon dried chives
1 teaspoon black pepper
1/2 teaspoon dried marjoram leaves
1/2 teaspoon celery seed
1/2 teaspoon curry powder
1/2 teaspoon garlic powder
1/4 teaspoon red pepper

Combine all of the ingredients in a glass jar and cover with a tight-fitting lid. Shake to blend. This keeps for several months in the pantry.