Tag: free recipe

Ice Cream Made at Home! Caramelized Honey Ice Cream

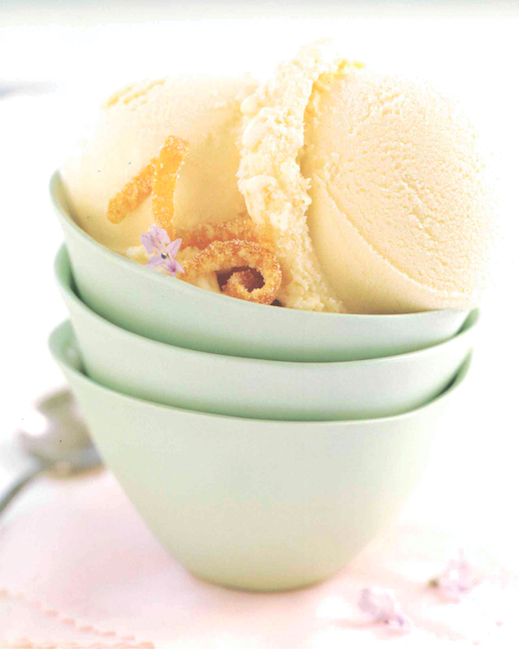
Ice cream is perhaps one of the most popular foods in the world. While many people visit their local ice cream parlor or grocery store frozen food aisle to satisfy their ice cream fix, this delicious and often decadent dessert can be made right at home. Those who want to try their hands at homemade ice cream should consider the following recipe for “Caramelized Honey Ice Cream With Rosemary and Orange” from Lori Longbotham’s “Luscious Creamy Desserts” (Chronicle Books).

Caramelized Honey Ice Cream With Rosemary and Orange

Serves 6 to 8

1/2 cup honey

2 cups heavy whipping cream

11/2 cups whole milk

2 6-inch sprigs fresh rosemary

5 strips orange zest, removed with a vegetable peeler

8 large egg yolks

1/2 cup sugar

Pinch of salt

1/2 cup fresh orange juice

Honey Caramel Sauce (see below)

Bring the honey to a boil in a medium heavy saucepan over medium heat. Boil for 5 minutes, or until darkened, but not burned, and very fragrant. Remove the pan from the heat.

Bring the cream and milk just to a boil in a large, heavy saucepan over medium heat. Stir in the rosemary and zest, remove the pan from the heat, and let stand, covered, for 15 minutes.

Discard the rosemary and zest. Whisk the honey into the cream mixture and cook, whisking occasionally, over low heat for a few minutes, until well combined and smooth.

Whisk together the egg yolks, sugar and salt in a medium bowl. Slowly pour in the warm cream mixture, whisking constantly. Return to the saucepan and cook, whisking constantly, over medium-low heat until the custard has thickened and coats the back of a spoon; if you draw your finger across it, it should leave a track. Do not let the custard boil or scorch on the bottom; if tiny bubbles appear around the edges, remove the pan from the heat for a few minutes to cool the custard, continuing to whisk.

Pour the custard through a fine strainer set over a large glass measure or bowl. Whisk in the orange juice. Let cool to room temperature, whisking occasionally, then refrigerate, tightly covered, for 3 hours, or until thoroughly chilled, or for up to 1 day.

When ready to freeze, pour the mixture into an ice-cream maker and freeze according to the manufacturer’s instructions. Transfer to a freezer container and freeze for at least 2 hours before serving.

To serve, spoon the ice cream into serving bowls or glasses. Drizzle with the Honey Caramel Sauce, if desired.

Honey Caramel Sauce

Makes about 2 cups

11/2 cups honey

1/2 cup heavy whipping cream

Pinch of salt

2 teaspoons fresh lemon juice

1/2 teaspoon pure vanilla extract

Bring the honey to a boil in a medium, heavy saucepan over medium-high heat. Boil for 5 minutes, or until darkened, but not burned, and very fragrant. Reduce the heat to medium-low and slowly and carefully pour in the cream. Add the salt, bring to a boil over medium heat, and boil for 5 minutes, or until slightly thickened; the sauce will thicken further as it stands.

Add the lemon juice and vanilla and pour the sauce through a fine strainer set over a medium glass measure or bowl. Serve hot or warm, or let cool and refrigerate, tightly covered, for up to 2 months. Serve chilled, or gently reheat the sauce before serving, adding a little water or cream if necessary to thin it slightly. PC15C746

Sliced Steak With Crispy Polenta

Parents faced with the nightly task of preparing meals for their families often feel as if there’s just not enough time to cook a hearty, homecooked meal the whole family can enjoy. Long hours at the office can make some parents feel like they need to be magicians to serve up a delicious meal in the time between arriving home from work and going to bed.

But family-friendly meals can still find their way to your dinner table even if you are pressed for time. The following recipe for “Sliced Steak With Crispy Polenta” from “Weightwatchers: Cook It Fast” (St. Martin’s Press) can be whipped up in roughly 30 minutes, meaning it’s entirely possible for families to sit down to a fresh and delicious meal any night of the week.

Sliced Steak With Crispy Polenta

Serves 4

1 1-pound lean flank steak, trimmed

1/2 teaspoon ancho or regular chili powder

1/2 teaspoon salt

1 16-ounce tube fat-free polenta, cut into 12 slices

11/2 cups fresh or thawed frozen corn kernels

1 red bell pepper, chopped

1/2 red onion, chopped

1 jalapen^to pepper, seeded and minced

2 tablespoons chopped fresh cilantro

1. Spray ridged grill pan with nonstick spray and set over medium-high heat. Sprinkle steak with chili powder and salt. Place steak in pan and cook until an instant-read thermometer inserted into side of steak registers 145 F for medium, about 5 minutes on each side. Transfer steak to cutting board and let stand 5 minutes. Cut on a diagonal into 16 slices.

2. Meanwhile, spray boiler rack with nonstick spray and preheat boiler. Arrange slices of polenta on rack and broil 5 inches from heat until crispy and heated through, about 2 minutes on each side.

3. Spray medium skillet with nonstick spray and set over medium heat. Add corn, bell pepper, onion, and jalapen^to pepper; cook, stirring, until softened, about 5 minutes. Remove skillet from heat and stir in cilantro.

4. Place 3 slices of polenta on each of 4 plates and top each serving with 4 slices of steak. Divide corn mixture evenly among plates.

Do it faster: To neatly and quickly remove the kernels from an ear of corn, place a bowl in the sink, stand the corn on end inside the bowl, and cut off the kernels with a knife. Any fly-away kernels will end up in the sink.

PC155117

A Tasty and Traditional Take on Chicken

Chicken can be served in various ways, and that versatility no doubt contributes to the popularity of poultry. Some people love their chicken fried, while others can’t get enough grilled chicken. Baking chicken may not be as popular as frying or grilling it, but baked chicken is no less delicious. For chicken lovers used to frying or grilling their favorite meals, the following recipe for “Home-Style Baked Chicken” from Laurie McNamara’s “Simply Scratch: 120 Wholesome Homemade Recipes Made Easy” (Avery) may just make you a baked chicken devotee.

Home-Style Baked Chicken

Serves 4 to 6

2 tablespoons olive oil

2 tablespoons unsalted butter

11/2 teaspoons Poultry Seasoning (see below)

1 teaspoon salt

1/4 teaspoon freshly ground black pepper

1 cup unbleached all-purpose flour

1/2 teaspoon paprika

4 to 5 pounds skin-on, bone-in chicken thighs and

drumsticks

Preheat the oven and a 9-by-13-inch metal roasting pan to 375 F. Place the olive oil and butter in the pan and place the pan in the oven on the lower rack.

In a small bowl, combine the poultry seasoning, salt and pepper. Set aside.

Place the flour in a resealable bag. Place a few pieces of the chicken in the flour at a time, seal, and shake to coat. Remove and vigorously shake off any excess flour. Place the flour-dusted chicken on a clean platter. Repeat with the remaining chicken pieces.

Remove the roasting pan from the oven and immediately arrange the chicken skin-side up in a single layer over the bottom of the pan and then sprinkle with some of the poultry seasoning blend and paprika. It should sizzle.

Place the hot pan back on the lower rack of the oven and bake for 20 minutes. Remove, baste by spooning the juices that have collected in the pan over each piece, and then sprinkle the chicken with the remaining poultry seasoning blend.

Return the pan to the oven and bake for 20 minutes more. Remove and baste one last time before moving the chicken to the middle rack and baking for 10 to 15 minutes more to further crisp the chicken skin.

Let rest for 5 to 8 minutes before serving.

Poultry Seasoning

Makes 3 tablespoons

3 teaspoons dried thyme

11/2 teaspoons dried marjoram

1 teaspoon dried rosemary

1/2 teaspoon freshly grated nutmeg

2 teaspoons paprika

2 teaspoons ground sage

In a spice grinder or using a mortar and pestle, combine 2 teaspoons of the thyme, the marjoram and the rosemary. Blend until finely ground. Transfer to an airtight container and add the remaining 1 teaspoon thyme, the nutmeg, the paprika, and the sage. Store in a dry, dark place for up to 6 months.

Warm Up With Wild Rice Soup!

Soup is an ideal meal on cold winter days. One of the best things about soup is its versatility. Soup makes a great entree, and it also can serve as a warming appetizer or a delicious side dish. Soup also knows no bounds with regard to ingredients, making it a meal that can be enjoyed several times per week without boring the taste buds. Those who need to warm up this winter may want to try the following recipe for “Minnesota Wild Rice Soup” courtesy of The Culinary Institute of America’s “Book of Soups” (Lebhar-Friedman).

Minnesota Wild Rice Soup

Makes 8 servings

2 tablespoons unsalted butter
3 carrots, finely diced
2 leeks, white and light green parts, finely diced
2 celery stalks, finely diced
1/4 cup all-purpose flour
2 quarts Chicken Broth (see below)
3/4 cup wild rice
1/2 teaspoon salt, or to taste
3/4 cup heavy cream, hot
3 tablespoons dry sherry
1/4 cup minced chives
3 tablespoons chopped parsley

Heat the butter in a soup pot over medium heat. Add the carrots, leeks and celery. Cook until softened, about 5 minutes.
Reduce the heat to low, add the flour, and stir well. Cook gently, about 3 minutes, stirring constantly.
Add the broth gradually, whisking well with each addition to eliminate flour lumps. Bring to a simmer.
Add the wild rice and salt. Continue to simmer until the rice is tender but still somewhat chewy, about 45 minutes.
Stir in the heated cream and sherry. Season with salt. Serve in heated bowls, garnished with chives and parsley.

Chicken Broth

Makes about 2 quarts

4 pounds stewing hen or chicken parts or meaty bones, such as backs and necks
3 quarts cold water
1 large onion, diced
1 carrot, diced (about 1/3 cup)
1 celery stalk, diced (about 1/2 cup)
5 to 6 whole black peppercorns
3 to 4 parsley stems
1 bay leaf
1 sprig fresh thyme
11/2 teaspoons salt, or to taste

Place the chicken and water in a large pot (the water should cover the chicken by at least 2 inches; add more if necessary). Bring the water slowly to a boil over medium heat.
As the water comes to a boil, skim any foam that rises to the surface. Adjust the heat once a boil is reached so that a slow, lazy simmer is established. Cover partially, and simmer 2 hours, skimming as often as necessary.
Add the remaining ingredients. Continue to simmer, skimming the surface as necessary, until the broth is fully flavored, about 1 hour.
If using hen or chicken parts, remove them and cool slightly. Dice or shred the meat, and reserve to garnish the broth or save for another use. Discard the skin and bones.
Strain the broth through a fine sieve or cheesecloth-lined colander into a large metal container. Discard the solids.
If you are using the broth right away, skim off any fat on the surface. If you are not using the broth right away, cool it quickly by transferring it to a metal container (if it’s not in one already) and placing the container in a sink filled with ice-cold water. Stir the broth as it cools, and then transfer it to storage containers. Store in the refrigerator, up to 5 days, or in the freezer, up to 3 months. Label and date the containers clearly before putting them into the freezer.

PC161809

Cooking Tips for One or Two

While it seems like reducing food portions would be easy, those used to prepping meals for a large family may find it difficult. The following tips can make meal preparation efficient and cost-effective.


* Divide and store. Supermarkets are increasingly offering larger packages of food products as well as “family size” offerings to compete with warehouse clubs. Buying in bulk can help individuals save money, but it may not always be practical for people living alone or with just a spouse. If you must buy in bulk, invest in a food vacuum sealer or freezer storage bags. Immediately separate meats and poultry into smaller portions before storing them in the freezer. Otherwise, look for bulk items that are individually wrapped to maintain freshness. Many canned and jarred items can be covered and stored in the refrigerator after containers are opened.

* Plan meals with similar ingredients. To reduce food waste, use leftovers to create casseroles or mix them in with new meals. Broiled or grilled chicken can be used to make soups, stir-fry dishes, fajitas, and sandwiches. The fewer ingredients you have to buy, the smaller the risk of spoilage.

* Cut recipes in half. Recipes can be cut down depending on how many mouths need to be fed. When baking, cutting back on proportions of ingredients can be challenging. Search online for recipe-scaling programs that can make the work easier.

Cook on the weekend. Use a weekend day to prepare food and package it into small containers in the refrigerator or freezer. Then the containers can be taken out as needed and heated quickly in the microwave for fast meals.

* Organize a meal-sharing club. Get together with a few friends who also have empty nests and split cooking duties. If you’re accustomed to cooking larger portion sizes, do so and then spread the wealth with others in the group. Then sit back and relax when it is your opportunity to have meals delivered to you.


[LP143029]

Fall Entertaining – Autumn Harvest Sangria

Today features a top pick for fun and fresh Fall entertaining – Autumn Sangria! While there are many variations available, Sangria requires minimal assembly and only a few basic ingredients.

Autumn Harvest Sangria

1 bottle red wine (or white!)
1 bottle sparkling apple cider
1 orange, peeled & sliced
1/4 c. molasses
1 c. dried apricots
2 apples, peeled, bite-size pieces
1/4 c. pomegranate seeds (garnish on top before serving)

Mix all ingredients together in a large punchbowl with ice, top with pomegranate seed garnish. Enjoy!

Do you have a favorite holiday punch recipe? Share in our Comment section below! 🙂

Pumpkin DIY, Recipes & Health Benefits

With Fall in full swing, pumpkins are popping up everywhere from Autumn décor to the dinner table! There are many ways to utilize this fresh fall produce with both DIY home decorations and delicious recipe ideas.

  • DIY pumpkin decorations:
    • Spray paint – Go for the gold! Spray pumpkins in a gold shimmer for instant upscale Fall décor
    • Lace – Slip a black lace stocking over a pumpkin for an unusual gothic Halloween look
    • Ombre – Choose naturally colored pumpkins but display either stacked or lined up in order from light to dark – ombre effects are on trend for this Fall
  • Health benefits of pumpkin:
    • Low calorie
    • High in anti-oxidants – vitamins A, C, & E
    • Natural source of copper, calcium & potassium

Do you have a favorite pumpkin recipe? Share in the Comments!

Apple Butter: Fall Recipe Favorite

Fall apples are a fresh, Pennsylvania favorite! Autumn offers the pick of the litter when it comes to this locally produced fruit. Perfect for mid-day snacking, baked in a pie, or start canning now to have holiday presents for friends and family!

One classic way to preserve is by making apple butter. Apple butter has a long history in the Pennsylvania & Ohio areas – like tapping trees for maple syrup, it was often a big celebration, with families and friends all gathering to pitch in for this yearly tradition.
Apples are are peeled, corred and boiled to create this sweet and creamy fruit butter. Copper kettles were a mainstay of this tradition, kept with a fire underneath for an entire day to make a batch of apple butter. Now, apple butter can be made worry-free at home in a crock-pot or with some watch, on the stove.
To make your own apple butter at home, follow one of these recommended recipes:

Crock Pot Apple Butter

Classic All Day Apple Butter

Applesauce Apple Butter

What’s your favorite way to enjoy Fall apples? Fresh from the tree? Pie? Crisp? Carmel dipped? Share your Favorite in our Comments!

Simple Basil Pesto Recipe

Simple basil pesto can be a bright, flavorful twist on a classic spaghetti & red sauce. Pesto can be made ahead and frozen or canned for homemade taste anytime. Pesto can be tossed with pasta, or serve as a spread with bread!

Our featured basil pesto recipes range from sweet to spicy & even feature a nut-free pesto! Click on the links below to find the full recipe – image

*Classic Basil Pesto
*Garlic & Basil Pesto
*Walnut & Parsley Pesto
*Spinach & Basil Pesto: Nut-Free Pesto

Do you have a favorite pesto recipe? Share your recipe or post the link in the Comment section below!


Recipe: Peach Cobbler

Fresh, ripe peaches are a sweet, summertime treat! Juicy peaches and cream, fresh smoothies, peach salsa, peach preserves….while the list could go on – one favorite peach classic is – cobbler!

Peach cobbler can vary by topping, but most all contain the essentials:

*Butter

*Sugar

*Peaches

Cinnamon and vanilla are classic flavor enhancements or try a twist like ginger or cardamom for an exciting new spice!

Follow the links below to try your hand at baking your own sweet summertime peach cobbler!

*Classic Bisquick Peach Cobbler (Biscuit style topping)

*Classic Peach Cobbler(Cake-like topping)

*Juicy Peach Crisp (Brown sugar & oat crumble topping)

Service with vanilla ice cream, or make your own Creme Anglaise sauce. A creme anglaise sauce is a simple vanilla and cream custard – a perfect compliment to a warm peach cobbler.

Have a favorite peach recipe? Share the recipe or link in the comments below!