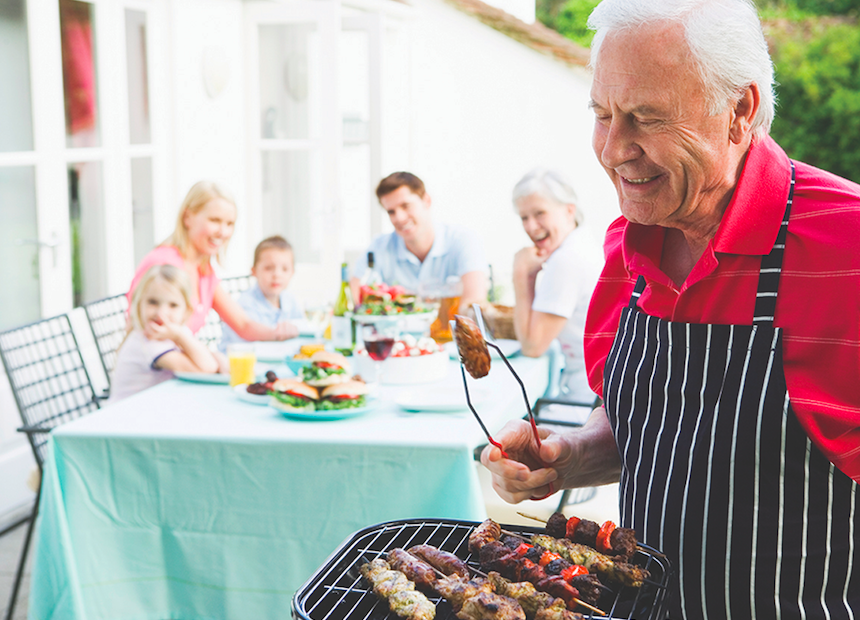
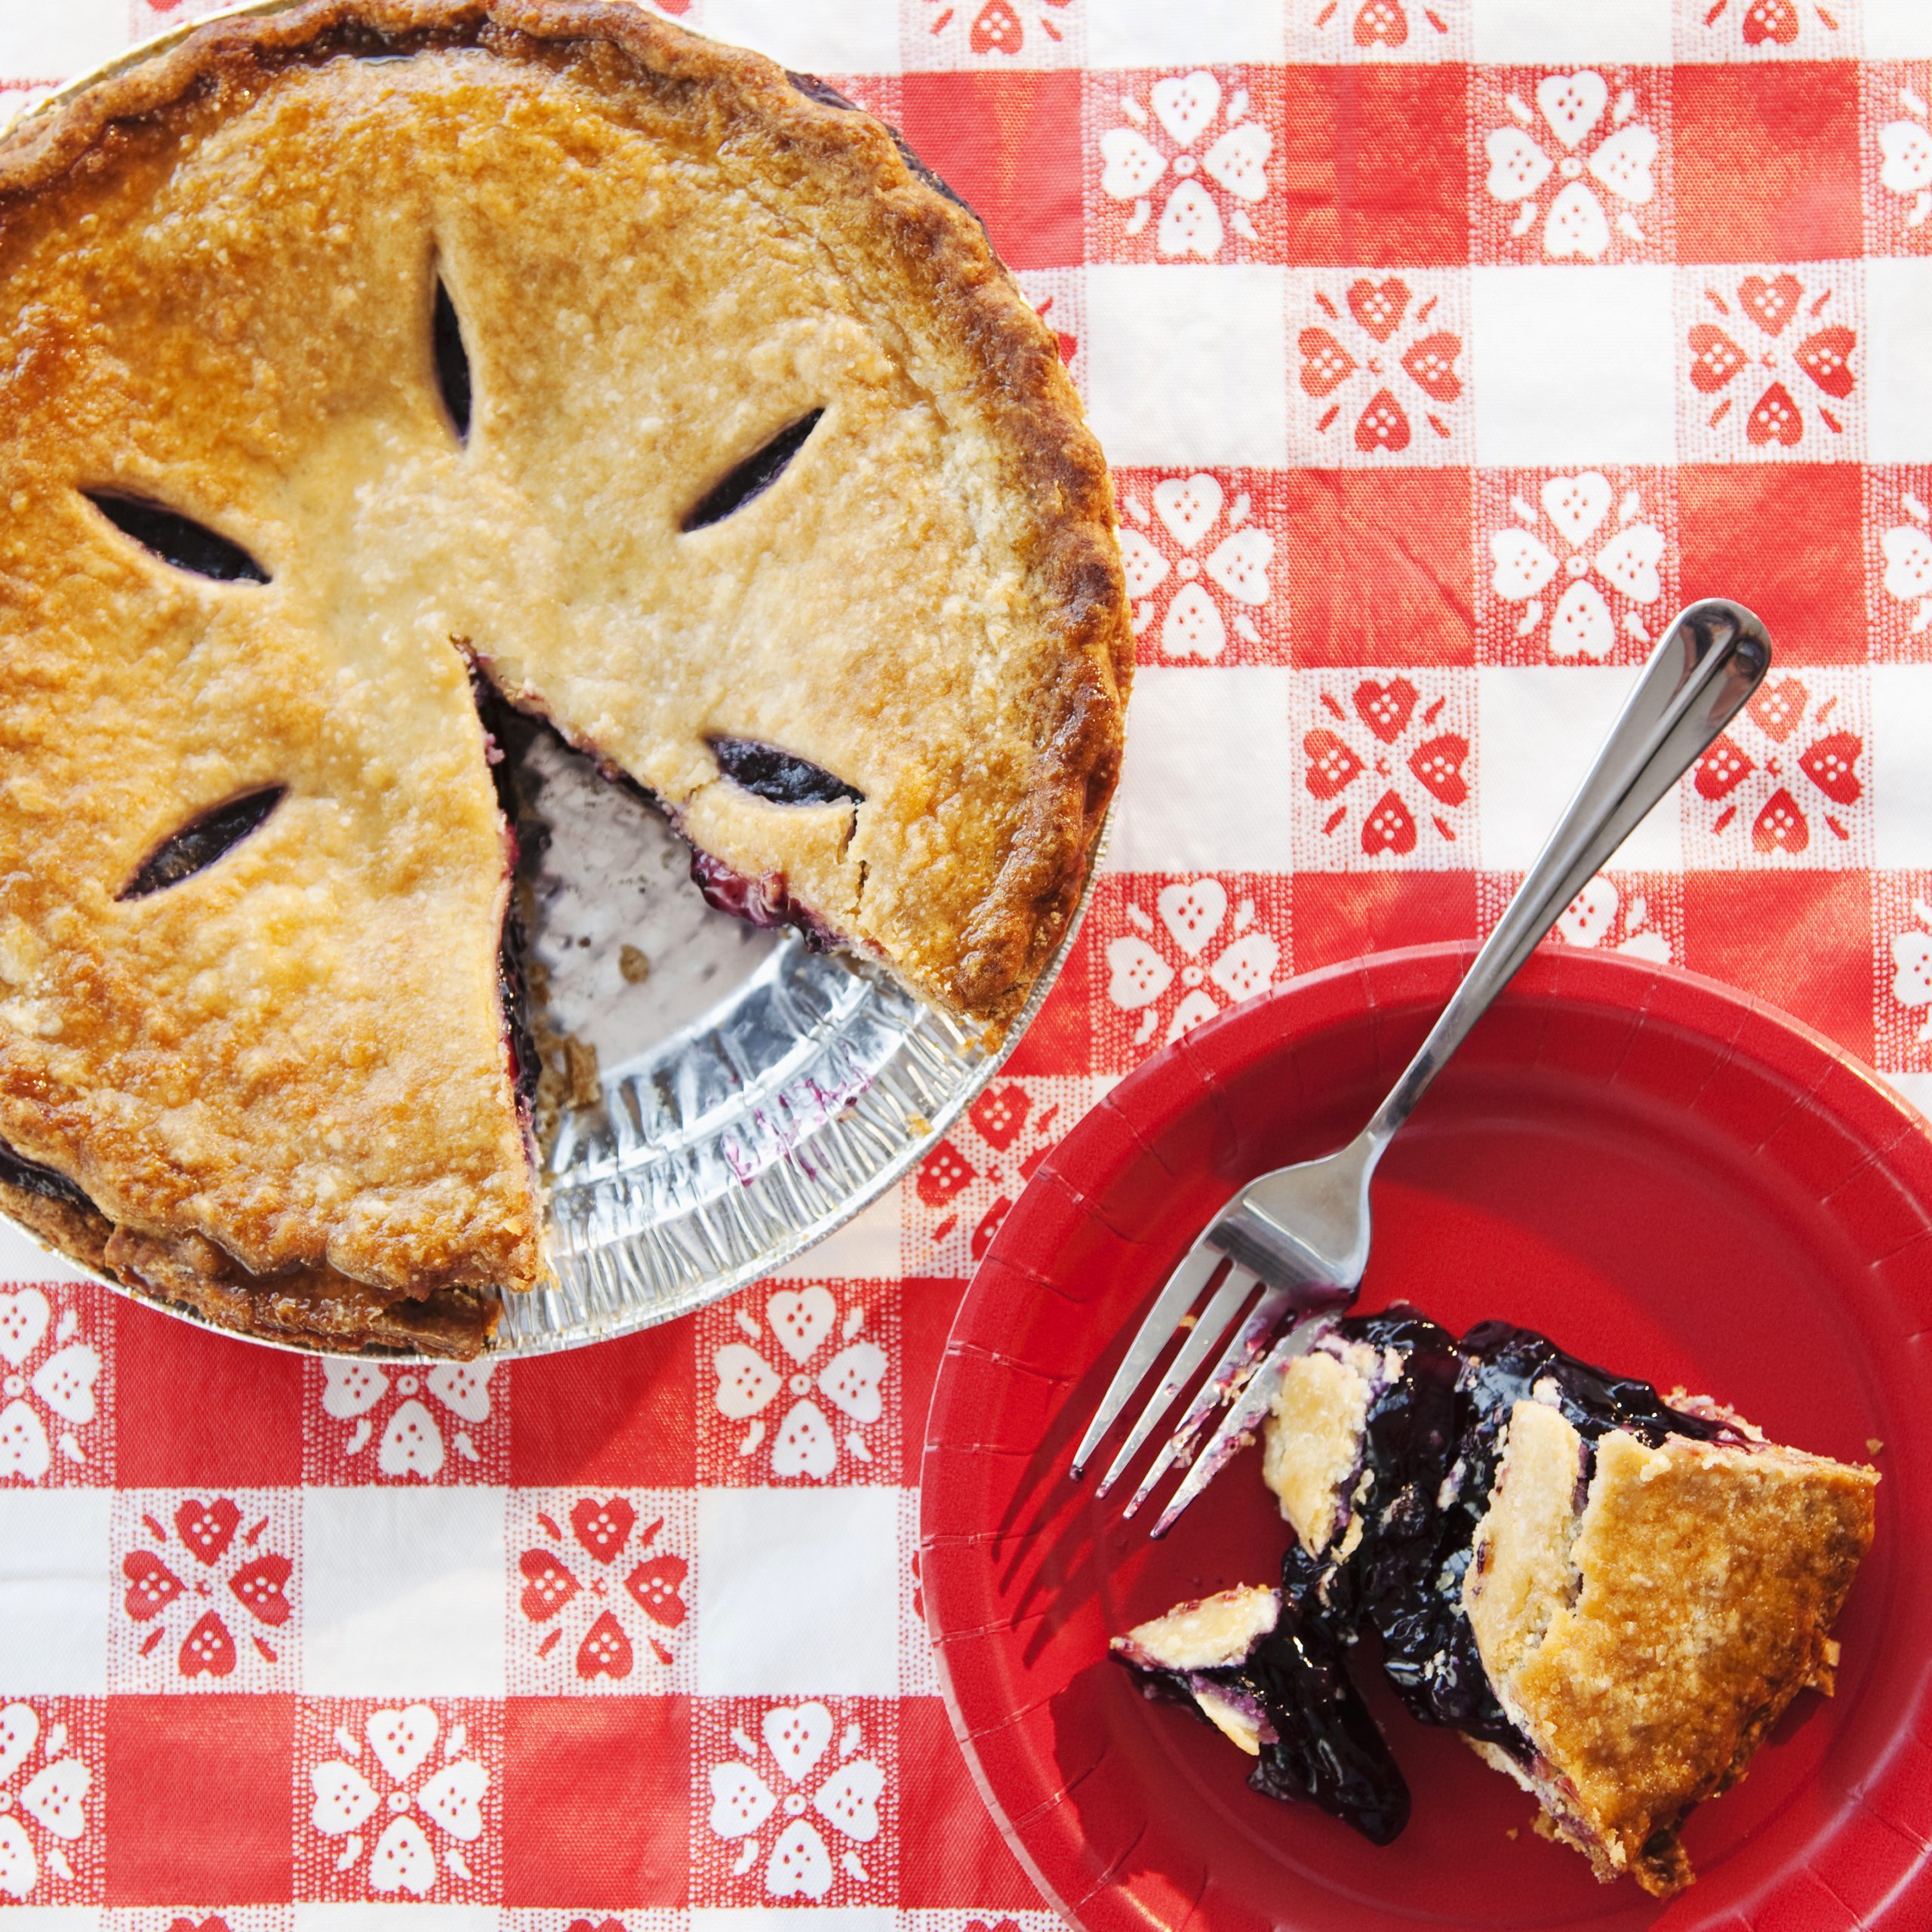
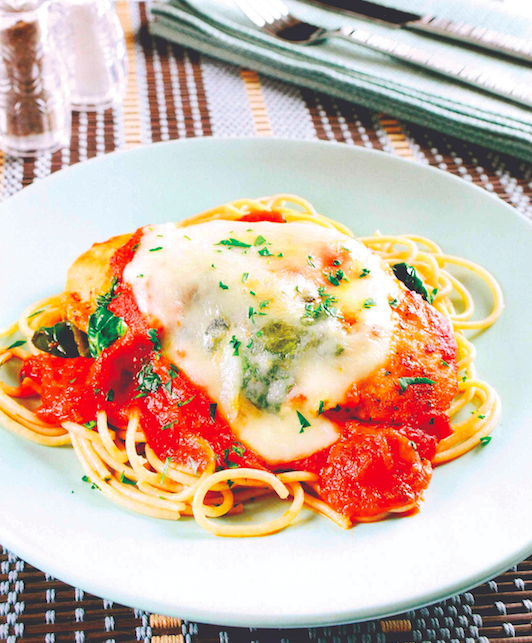
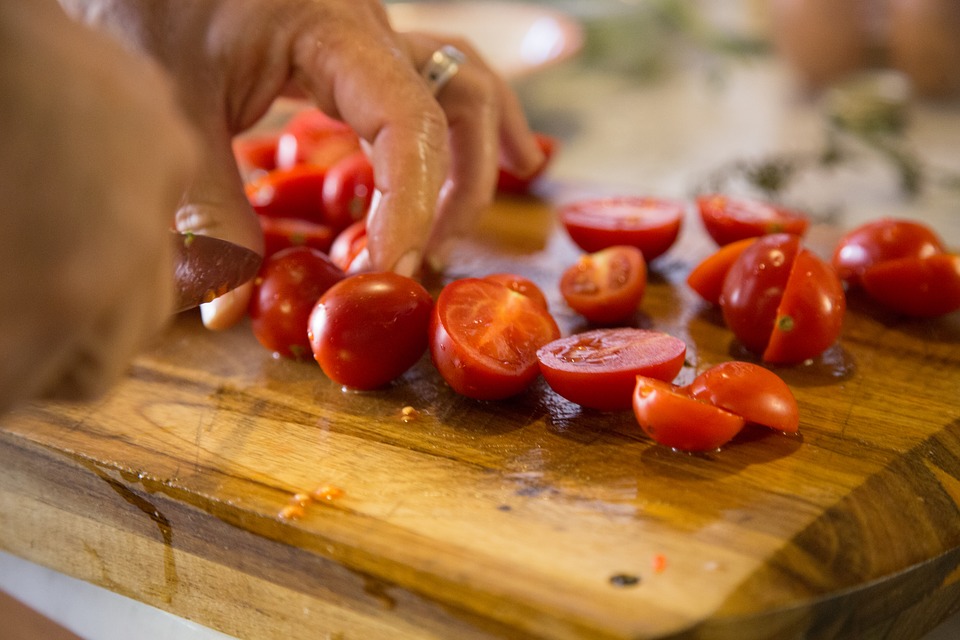
Tag: recipe

Fourth of July Cookie Cups

July 4th celebrations are much anticipated each year. Whether they include an intimate barbecue with a close-knit group of friends or a massive block party with everyone from the neighborhood, there’s a strong chance that food will be part of the party.

As various menu items will hit the grill, hosts and hostesses may wonder which desserts to serve to make their events complete. While there is seemingly nothing more American than apple pie, cookies also can be sweet ways to help wrap up the festivities. Sugar cookies are a universal favorite, and in this recipe for “Fourth of July Cookie Cups” they’re shaped into cups filled with a buttercream frosting.

Enjoy this star-spangled showcase, courtesy of “Live Well, Bake Cookies” (Rock Point) by Danielle Rye.

Fourth of July Cookie Cups

Makes 24

Nonstick cooking spray, for greasing the pan

1 1/2 cups all-purpose flour, spooned and leveled

1 teaspoon cornstarch

1/2 teaspoon baking powder

1/4 teaspoon salt

1/2 cup (1 stick) unsalted butter, softened

3/4 cup granulated sugar

1 large egg, at room temperature

1 teaspoon vanilla extract

Red, white and blue sprinkles, for topping

Vanilla Buttercream Frosting

1/2 cup (1 stick) unsalted butter, softened

1 1/2 cups powdered sugar

1 tablespoon heavy whipping cream or milk

1 teaspoon pure vanilla extract

1. To make the cookie cups: preheat the oven to 350 F. Spray a 24-count mini muffin pan with nonstick cooking spray and set aside.

2. In a large mixing bowl, whisk together the flour, cornstarch, baking powder, and salt. Set aside.

3. In the bowl of a stand mixer fitted with the paddle attachment or in a large mixing bowl using a handheld mixer, beat the butter and granulated sugar together for 1 to 2 minutes, or until well combined.

4. Mix in the egg and vanilla extract until fully combined, making sure to stop and scrape down the sides of the bowl as needed.

5. Mix in the dry ingredients until just combined.

6. Evenly distribute the cookie dough among all 24 cups in the mini muffin pan, a little more than 1 tablespoon of cookie dough per cup. Press each ball of cookie dough into the cups and smooth it out.

7. Bake for 11 to 13 minutes, or until the edges of the cookie cups are lightly browned and the tops are set.

8. Remove from the oven, and make an indentation in each cookie using the back of a measuring spoon. Allow to cool in the muffin pan, then carefully remove from the pan and set aside.

9. To make the vanilla buttercream frosting: In the bowl of a stand mixer fitted with the paddle attachment or in a large mixing bowl using a handheld mixer, beat the butter for 1 to 2 minutes until smooth. Add the powdered sugar, 1/2 cup at a time, mixing in each addition until well combined.

10. Add the heavy whipping cream and vanilla extract, and continue mixing until fully combined, stopping to scrape down the sides of the bowl as needed. Pipe the frosting into the cooled cookie cups and top with the sprinkles.

12. Store the cookie cups in an airtight container at room temperature or in the refrigerator for up to 4 days.

A Perfect Dish For A New Year’s Day Brunch

The late-night revelry of New Year’s Eve has made New Year’s Day brunch a go-to tradition for millions of people. Staying up until the calendar officially turns from one year to the next at the stroke of midnight can make it harder to get out of bed on the morning of January 1, so there may be no better day to plan a brunch than the first day of the calendar year.

Many restaurants offer brunch specials on New Year’s Day, but people need not leave home to ensure their first meal of the new year is delicious. This recipe for “Pan-Fried Eggs and Mixed Mushroom Sauté on Toasted Sourdough Slices” from “Sunday Brunch” (Chronicle Books) by Betty Rosbottom can be just the dish to begin a new year.

Pan-Fried Eggs and Mixed Mushroom Sauté on Toasted Sourdough Slices

Serves 4

Mushroom Sauté

11/4 ounces mixed dried mushrooms

11/2 cups boiling water

3 tablespoons olive oil

8 ounces sliced brown mushrooms

2 teaspoons minced garlic

1 teaspoon dried crushed rosemary (see tip)

Kosher salt

Freshly ground black pepper

Toast and Eggs

4 1/2-inch thick sourdough slices

Olive oil

2 tablespoons unsalted butter

4 eggs

Kosher salt

Freshly ground black pepper

Rosemary sprigs for garnish (optional)

1. For the Mushroom Sauté: Place the dried mushrooms in a medium bowl and cover with the boiling water. Let stand until softened, 20 minutes. Strain in a sieve lined with a double thickness of paper towels and reserve the soaking liquid. Coarsely chop the mushrooms.

2. Heat the olive oil in a medium, heavy frying pan set over medium heat. When hot, add the brown mushrooms and sauté, stirring often, for 6 minutes. Add the reserved mushrooms, garlic, rosemary, and 1/2 teaspoon salt; stir for 1 minute. Add the mushroom liquid and cook, stirring, until it has evaporated, 4 to 7 minutes. Season with salt and several grinds of pepper. Remove the frying pan from the heat and cover with foil to keep warm. (The mushrooms can be prepared 1 day ahead; cool, cover and refrigerate. Reheat, stirring, over medium heat.)

3. For the toast and eggs: Brush both sides of the bread slices generously with olive oil. Set a 10- to 11-inch nonstick frying pan over medium-high heat, and, when hot, add the bread and cook until lightly browned, about 2 minutes per side. Remove the toast and cover loosely with foil. When pan is cool enough to handle, wipe it out with clean paper towels.

4. Add the butter to the frying pan and set it over medium heat. When the butter starts to foam, break an egg into a saucer, being careful to remove any shell fragments., and gently slide it into the frying pan. Repeat with the remaining eggs. Immediately reduce the heat to low and cook, basting the eggs with some of the butter in the pan frequently, until the whites are firm and the yolks are still soft and runny, 3 minutes.

5. While the eggs are cooking, arrange a toasted bread slice on each of four plates. Mound the mushrooms evenly over the toast.

6. Remove each egg with a spatula and arrange on top of the mushrooms. Season with salt and pepper and, if desired, garnish each serving with a rosemary sprig. Serve immediately.

Chocolate Cookies Are A Sweet Finale To Thanksgiving Dinners

Holiday entertaining season begins on Thanksgiving. Anyone who has been tasked with hosting Thanksgiving understands the commitment required to prepare a delicious meal for guests, which often encompasses appetizers, several side dishes and, of course, turkey as the centerpiece. Guests attending a Thanksgiving dinner can give holiday hosts and hostesses a break by providing dessert.

Cookies are a popular treat. Thanks to their flavor, portability and relatively short preparation and cooking times, cookies are a smart choice when bringing dessert to a holiday gathering. This recipe for “Flourless Chocolate Cookies” from Danielle Rye’s “Live Well Bake Cookies: 75 Classic Cookie Recipes for Every Occasion” (Rock Point) offers the added benefit of being flourless. That means that even those with gluten allergies or intolerances can indulge.

Flourless Chocolate Cookies

Makes 24 to 36 cookies

3 cups powdered sugar

3/4 natural unsweetened cocoa powder

1/2 teaspoon espresso powder (optional)

1/4 teaspoon salt

2 large egg whites, at room temperature

1 large egg, at room temperature

1 1/2 teaspoons pure vanilla extract

  1. Preheat the oven to 350 F. Line two large baking sheets with parchment paper or silicone baking mats and set aside.
  2. In a large mixing bowl, sift the powdered sugar and unsweetened cocoa powder together, then whisk in the instant espresso powder (if using) and salt until well combined. Set aside.
  3. In a separate mixing bowl, whisk together the egg whites, egg, and vanilla extract until fully combined.
  4. Add the wet ingredients to the dry ingredients, and stir until the mixture is fully combined and smooth.
  5. Using a 1-tablespoon cookie scoop, scoop the cookie dough onto the prepared baking sheets, making sure to leave a little room between each one.
  6. Bake for 11 to 14 minutes, or until the tops of the cookies are set. Remove from the oven, and allow the cookies to cool completely on the baking sheets.

Store the cookies in an airtight container at room temperature for up to 5 days.

Make a Household Favorite More Healthy

Many beloved dishes might be enjoyed more often if they were only a little healthier. Author and former personal chef Michelle Dudash was once asked by a client if the she could make a healthier version of chicken parmesan. The result of that request is the following recipe for “Skinny Chicken Parmesan with Spinach,” which Dudash ultimately included in her book, “Clean Eating For Busy Families” (Fair Winds). The recipe was a hit with Dudash’s client and will surely be a hit at home cooks’ dinner tables as well.

Skinny Chicken Parmesan with Spinach (Makes 6 servings)

For the sauce:

2 teaspoons extra-virgin olive oil
2 cloves garlic, sliced
1 28-ounce can whole tomatoes
1/4 teaspoon dried basil
1/4 teaspoon dried oregano
2 pinches salt
2 pinches freshly ground black pepper
1/2 teaspoon honey

For the chicken:

3 tablespoons grated Parmesan cheese
2 tablespoons whole-wheat flour
1/2 teaspoon salt, divided
1/4 teaspoon freshly ground black pepper
1/4 teaspoon dried basil
11/2 pounds chicken breast, cut into 6 pieces, pounded to 1/4 inch
2 tablespoons plus 2 teaspoons extra-virgin olive oil, divided
4 cups baby spinach
1 teaspoon lemon juice
3/4 cup fresh mozzarella cheese, sliced into 6 medallions (or shredded)
6 cups cooked whole-grain thin spaghetti tossed in 2 teaspoons olive oil

Preheat oven to 375 F and coat the bottom of a 9 x 13-inch pan with olive oil spray.

To make the sauce: Heat a medium saucepan over medium heat. Add oil and garlic and cook gently for 30 seconds. Do not brown. With your hand, squeeze each tomato into the pan and add basil, oregano, salt, pepper, and honey. Reduce to medium heat and simmer for 20 minutes, lowering the heat as needed.

To make the chicken: Combine parmesan cheese, flour, salt, pepper, and basil in a medium dish and coach chicken with cheese mixture. Place a large skillet over medium heat and add 2 tablespoons of oil. When oil is shimmering, add chicken, rounded-side down, and cook until golden on one side, about 5 minutes. Arrange chicken in a baking pan. Pour remaining 2 teaspoons of oil into skillet and add spinach. Cook spinach for 1 to 2 minutes until wilted and swirl in lemon juice. Gently press spinach to release water and divide spinach on top of chicken. Spoon sauce around and over the chicken, place mozzarella on top, and sprinkle with 1/4 teaspoon salt. Bake for 15 minutes until chicken is cooked through. Serve over spaghetti.

Homemade Hummus With Truly Unique Taste

Hummus provides a delicious and healthy alternative to less nutritional dips. Versatile and available in various flavors, hummus can be whipped up at home for those who prefer to make their own dips. The following recipe for “Garbanzo-Carrot Hummus with Grilled Yogurt Flatbread” from James Campbell Caruso’s “España: Explore the Flavors of Spain” (Gibbs Smith) includes some Moroccan flavors that give this easy-to-prepare recipe a truly unique taste.

Garbanzo-Carrot Hummus with Grilled Yogurt Flatbread (Makes 2 cups)

2 medium carrots, peeled and chopped
Salt
1 cup cooked garbanzo beans, drained
4 teaspoons chopped cilantro plus 1 teaspoon for garnish
2 tablespoons chopped red onion
21/2 teaspoons ground cumin
11/2 teaspoons ground coriander seeds
2 tablespoons lemon juice
4 teaspoons olive oil
2 teaspoons chile flakes
2 teaspoons Moroccan Spice Blend (see below)
Coarse salt and freshly ground black pepper
1 batch Yogurt Flatbread (see below)

In a medium saucepan, combine the carrots with 2 quarts water and 2 teaspoons salt. Bring the mixture to a boil then reduce the heat and simmer for 8 to 10 minutes, until the carrots are tender. Remove the pan from the heat and allow the carrots to drain and cool in a colander.

Combine carrots and remaining ingredients, except for Yogurt Flatbread, in the work bowl of a food processor and puree until smooth. Season to taste with salt and pepper and garnish with the remaining cilantro. Serve with fresh, hot Yogurt Flatbread cut in wedges.

Moroccan Spice Blend (Makes about 2 tablespoons)

1 teaspoon ground cumin
1 teaspoon ground turmeric
1 teaspoon saffron threads
1 teaspoon ground coriander
1 teaspoon ground cinnamon
1 teaspoon ground smoked paprika
1 teaspoon finely grated lemon peel

In a small resealable glass or plastic container, combine all of the ingredients.

Yogurt Flatbread (Serves 4)

1 cup all-purpose flour
1/4 teaspoon baking powder
1 teaspoon coarse salt
21/2 cups plain yogurt
Olive oil

Sift the flour, baking powder and salt into the work bowl of a stand mixer fitted with the dough hook. Add the yogurt and mix on low speed for 2 minutes. Cover the work bowl and allow the dough to rest at room temperature for 30 minutes.

Preheat a gas or charcoal grill to medium. Scrape the dough from the work bowl and turn it out onto a lightly floured surface. Roll the dough into a long log and divide it into 12 equal pieces. Roll each piece into a ball and use a rolling pin or tortilla press to flatten it into a 1/4-inch-thick tortilla shape. Brush each “tortilla” lightly with olive oil. Grill each for about 40 seconds then turn and cook another 40 seconds.

Recipe: Pumpkin Cheesecake with Gingersnap Crust

Pumpkins are readily available in fall, when people carve jack-o’-lanterns out of pumpkins for Halloween or serve up pumpkin pie after a hearty Thanksgiving dinner. But people who are unsatisfied with plain old pumpkin pie can add something new to their repertoire this fall by cooking up the following recipe for “Pumpkin Cheesecake with Gingersnap Crust,” courtesy of Lori Longbotham’s “Luscious Creamy Desserts” (Chronicle Books).

Pumpkin Cheesecake with Gingersnap Crust (Serves 8 to 10)

Crust

11/2 cups gingersnap cookie crumbs
1/2 cup finely chopped hazelnuts
6 tablespoons unsalted butter, melted
1/4 cup sugar

Filling

11/2 pounds cream cheese, at room temperature
1/2 cup packed light brown sugar
1/4 cup granulated sugar
2 large eggs
2 large egg yolks
11/2 tablespoons all-purpose flour
2 teaspoons pumpkin pie spice
1 cup solid-pack pumpkin purée (not pumpkin pie mix)
1/2 cup créme fraîche, homemade (see below) or store-bought, or sour cream
2 teaspoons pure vanilla extract

1. Preheat the oven to 350 F. Lightly butter an 8- or 81/2-inch springform pan.
2. To make the crust: Stir together all of the ingredients in a medium bowl until the crumbs are moistened. Press the mixture over the bottom and up the sides of the pan. Bake the crust for 10 minutes. Let cool completely on a wire rack. Increase the oven temperature to 425 F.
3. To make the filling: With an electric mixer on medium speed, beat the cream cheese, brown sugar and granulated sugar in a large deep bowl until light and fluffy. Beat in the eggs and then the egg yolks one at a time, beating well after each addition. Add the flour and pumpkin pie spice and beat on low speed until just combined. Add the pumpkin purée, créme fraîche and vanilla, and beat until just combined. Pour the filling into the shell.
4. Place the cheesecake on a baking sheet and bake for 15 minutes. Reduce the oven temperature to 250 F and continue baking for 1 hour.
5. Turn the oven off and let the cheesecake cool in the oven for 21/2 hours. Then transfer to a wire rack and let cool to room temperature. Refrigerate, tightly covered, for at least 10 hours, until thoroughly chilled and set, or for up to 2 days.
6. To serve, run a knife around the side of the cheesecake and remove the side of the pan. Serve slightly chilled or at room temperature, cut into thin wedges with a sharp knife dipped into hot water and wiped dry after each cut.

Créme Fraîche (Makes about 1/2 cup)

1/2 cup heavy whipping cream
1/2 cup créme fraîche or sour cream with live cultures

Pour the cream into a glass jar with a tight-fitting lid and spoon in the créme fraîche. Let sit on the counter, with the lid slightly ajar, until the mixture thickens, from 4 to 24 hours, depending on the weather. Refrigerate, tightly covered, until ready to use.

Impress Guests With Homemade Salsa At Your Next Soirée

Gatherings of family and friends are better with food, and few foods are more universally beloved than salsa! Whether they’re hosting a gathering for the big game or a celebration of Hispanic culture and cuisine, hosts who want to go the extra mile can forgo store-bought salsa for the following homemade recipe for “Warm Black Bean Salsa” courtesy of Judith Finlayson’s “The Health Slow Cooker: 135 Gluten-Free Recipes for Health and Wellness” (Robert Rose).

Warm Black Bean Salsa (Makes about 3 cups)

2 cups cooked black beans, drained, rinsed and mashed (see tip 1 below)
1 cup diced tomatoes (see tip 2 below)
4 green onions, finely chopped
2 roasted peppers (poblano or sweet), peeled and diced
1 roasted jalapeño, seeded and diced, or 1 chipotle pepper in adobo sauce
1 teaspoon puréed garlic (see tip 3 below)
1 teaspoon finely grated lime zest
2 tablespoons freshly squeezed lime juice
2 cups shredded cheddar or Monterey Jack cheese
2 tablespoons finely chopped cilantro leaves

Finely chopped green onions

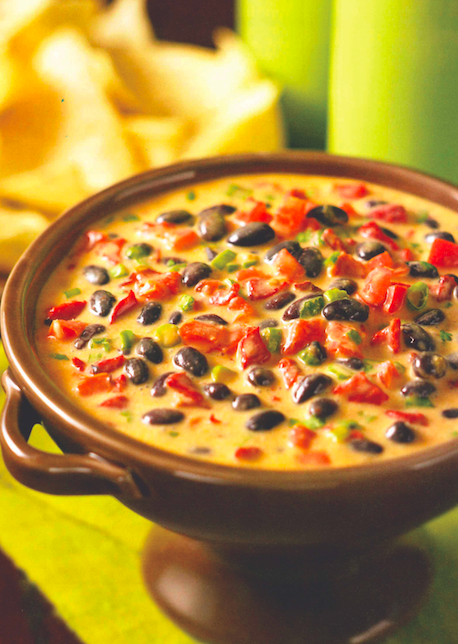
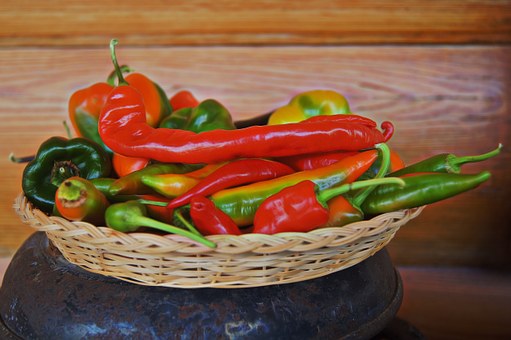
1. In slow cooker stoneware, combine beans, tomatoes, green onions, poblano, jalapeño peppers, garlic, lime zest and juice, and cheese. Stir well. Cover and cook on high for 11/2 hours, until mixture is hot and bubbly. Stir in cilantro, sprinkle with green onions, if using, and serve.

Tips

1. Use 14- to 19-ounce can of no-salt-added beans, drained. Or cook dried beans yourself (see below).
2. For convenience, substitute 1 cup drained no-salt-added diced canned tomatoes.
3. To purée garlic, use a sharp-toothed grater.

Basic Beans (Makes approximately 2 cups)

1 cup dried white beans (see tip below)
3 cups water

Garlic (optional)
Bay leaves (optional)
Bouquet garni (optional)

1. Long soak: In a bowl, combine beans and water. Soak for at least 6 hours or overnight. Drain and rinse thoroughly with cold water. Beans are now ready for cooking.
2. Quick soak: In a pot, combine beans and water. Boil for 3 minutes. Turn off heat and soak for 1 hour. Drain and rinse thoroughly under cold water. Beans are now ready to cook.
3. Cooking: In slow cooker stoneware, combine 1 cup presoaked beans and 3 cups fresh cold water. If desired, season with garlic, bay leaves or a bouquet garni made from your favorite herbs tied together in a cheesecloth. Cover and cook on low for 10 to 12 hours or overnight or on high for 5 to 6 hours, until beans are tender. Drain and rinse. If not using immediately, cover and refrigerate. The beans are now ready for use.

Tip: If you have difficulty digesting legumes, add 2 teaspoons cider vinegar or lemon juice to the water when soaking dried beans.

Fourth of July Barbecue Essentials

The 4th of July is fast approaching and revelers across the nation are preparing to toast their independence with family and friends. For many Americans, backyard barbecues are synonymous with the Fourth of July, a day that, in the United States of America, commemorates the adoption of the Declaration of Independence by the Second Continental Congress on July 4, 1776.

Precious few Americans can say they have not been present at a 4th of July barbecue or witnessed a fireworks display honoring America’s official declaration of independence from Great Britain. Hosting a July 4th barbecue for the first time may have some hosts anxious about throwing a summer soirée to remember, but fun is sure to be had if hosts remember to include the following backyard barbecue essentials this Independence Day.

Food

No Fourth of July barbecue is complete without food, so hosts should be sure to stock up on popular barbecue fare like hot dogs and hamburgers. Though such foods likely won’t be mistaken for gourmet fare anytime soon, Fourth of July revelers often embrace the tradition of grilling up some hot dogs and hamburgers even if they tend to avoid such foods throughout the rest of the year. Hosts should not feel pressured to provide gourmet fare on July 4th, but it is a thoughtful gesture to ask guests in advance if they have any food allergies or need to avoid certain foods for other reasons.

Beverages

It goes without saying that guests will need refreshing beverages at parties held in early July, but be sure to stock up on a variety of beverages so guests are not forced to consume drinks they don’t want. Be sure to have plenty of water available to guests, and provide sodas, iced tea and lemonade as well. Offer alcoholic beverages to adult guests, but don’t go overboard stocking up on alcohol, as that might encourage guests to overindulge.

Games

Backyard barbecues are most fun when guests are entertained, so plan to have some games available for guests of all ages. Encourage guests to bring a change of clothes or swimsuits if games will involve water or something that might soil their clothing. If you have a pool, purchase some pool games so swimmers can do more than just wade in the water or take a few laps. Plan a Wiffle® ball game for kids and dig some horseshoe pits or buy a ring toss set so adults can engage in some friendly competition as well.

Safety

Though no one wants to think of a 4th of July celebration taking a turn for the worst, hosts must prepare for emergencies. Restock the first-aid kit if necessary and keep a constant eye on guests, especially children, to ensure everyone is having a safe and happy time. Program a list of local taxi companies into your phone so you can easily call for transportation should any guests have too much to drink during the festivities. Hosts should abstain from alcohol so they can serve as designated driver should the need arise at the end of the night.

Backyard barbecues are a staple of July 4th, and there’s no reason your summer soirée can’t be one to remember for years to come.

TF156255

Maple Pecan Scone Recipe

Scones make an ideal companion to a morning cup of coffee or tea. Simple and delicious, this recipe for “Maple Pecan Scones” from Linda Collister’s “Quick Breads” (Ryland, Peters & Small) is ideal for scone lovers who want something quick to make in the morning.

Maple Pecan Scones

Serves 6

2 cups unbleached all-purpose flour

4 teaspoons baking powder

A good pinch of salt

4 tablespoons unsalted butter, chilled and cut into cubes

1 cup pecan pieces

1 extra-large egg

1/4 cup pure maple syrup

About 3 tablespoons milk

1 greased baking sheet

Preheat the oven to 425 F.

Sift the flour, baking powder and salt into a large bowl. Add the butter and rub it in with the tips of your fingers until the mixture resembles fine crumbs. Mix in the pecans.

In a separate bowl, beat the egg with maple syrup and 1 tablespoon of the milk. Stir into the flour mixture with a round-bladed knife to make a soft, coarse-looking dough. If the dough is dry and crumbly and won’t stick together, stir in more milk 1 tablespoon at a time. If the dough is very wet and sticky, work in another tablespoon of flour.

Tip out the dough onto a work surface lightly dusted with flour and gently work it with your hands for a few seconds so it looks smoother. Put the dough ball onto the prepared baking sheet. Dip your fingers in flour and pat out the dough to a round about 11/4 inches thick and 7 inches across. Using a knife, cut the round into 6 wedges, but do not separate the dough before baking.

Bake for 18 to 20 minutes until light golden brown. Transfer to a wire rack and leave until the wedges are cool enough to separate. Serve warm the same day. The cooled scones can be wrapped tightly and frozen for up to 1 month.

PC174947

Give Boring Lunches a Big Boost

Lunch might not be the most exciting meal of the day, and conventional wisdom might not suggest it’s the most important meal. But that does not mean lunch has to be boring.

For those who tend to lean on sandwiches for their midday meals, straying from the sandwich norm can provide some variety and flavor. The following recipe for “Warm Tandoori Chicken Wraps” from Vicki Liley’s “Asian Wraps & Rolls” (Periplus) can make for a unique lunch for the whole family or even serve as an easily prepared dinner.

Warm Tandoori Chicken Wraps

Makes 6 wraps

1/3 cup plain tandoori paste

2 tablespoons plus 1/2 cup plain yogurt

Grated zest and juice of 1 lemon

12 chicken tenderloin fillets or 3 skinless, boneless chicken breast fillets

2 carrots, peeled

1 English (hothouse) cucumber, halved and seeded

6 pieces naan

1 clove garlic, finely chopped

Leaves from 6 fresh mint sprigs, plus 2 tablespoons finely chopped fresh mint

In a small bowl, combine tandoori paste, 2 tablespoons yogurt, lemon zest, and lemon juice. Put chicken in a baking dish. Pour tandoori mixture over and stir until chicken is coated. Cover and refrigerate for 2 hours.

Light a fire in a charcoal grill or heat a grill pan. Brush grill or pan lightly with oil. Cook chicken for 4 to 5 minutes on each side, or until juices run clear when pierced with a skewer. Transfer to a cutting board and let rest for 5 minutes. Cut each tenderloin into 2 long strips (if using chicken breast fillets, slice each fillet into 4 long strips).

Using a vegetable peeler, cut carrot and cucumber into thin ribbons. To heat naan, follow instructions on packet. In a small bowl, stir 1/2 cup yogurt, garlic and chopped mint together.

Place naan on a work surface. Divide chicken, cucumber, carrot, and mint leaves among naan. Drizzle with yogurt mixture. Wrap the naan around filling and serve immediately.

PC174950